Short-Term Rentals
Fix Blurry Listings: Airbnb Photo Requirements, 2048px & AI Fixes
Boost your Airbnb bookings and guest clicks by optimizing listing photos with exact size specifications, proper ordering, and AI enhancements for maximum visual appeal.
By Hospitality Lens · · 14 min read
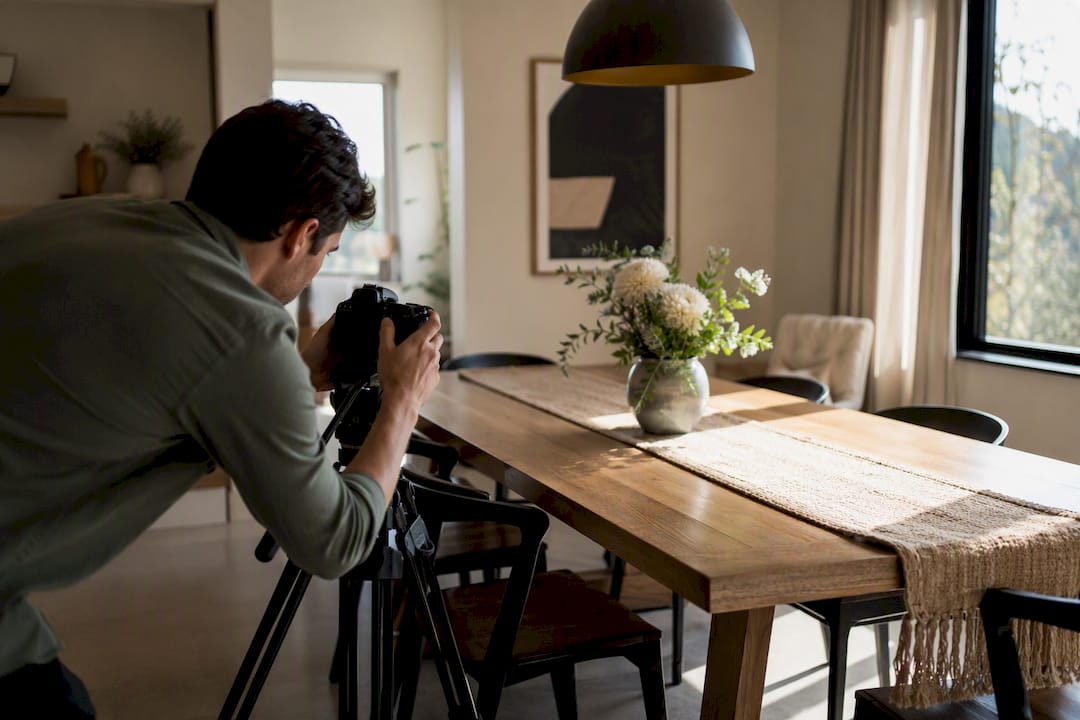
Pick a cover photo that sells the stay in one glance. That combination, correct specs plus a cover photo built for a thumbnail, drives the biggest jump in click-through of anything on this list. Everything else on your listing photo checklist matters less than getting these two things right first.
TL;DR:
- The primary photo should showcase the most desirable room in the best light, shot in natural soft light, from shoulder height or slightly lower.
- Export images at around 2048 pixels long edge in sRGB JPEG format under 2 MB to maintain quality after Airbnb’s compression.
- Place the bathroom as the fourth photo to address guest concerns about cleanliness early in the sequence.
- Use AI enhancement tools like HospitalityLens for quick fixes on dark, tilted, or cluttered photos rather than reshooting unless images are completely unusable.
- Consistently update cover photos every 12 months and bathroom photos every 6 months to reflect wear and improvements.
Table of Contents
What Are Airbnb’s Technical Photo Requirements?
Airbnb’s own guidance sets the floor at 1024 × 683 pixels, with landscape orientation preferred over vertical. That’s the minimum, not the target. Treat it the way you’d treat a speed limit sign on a highway on ramp: technically legal, but not where you want to be cruising.
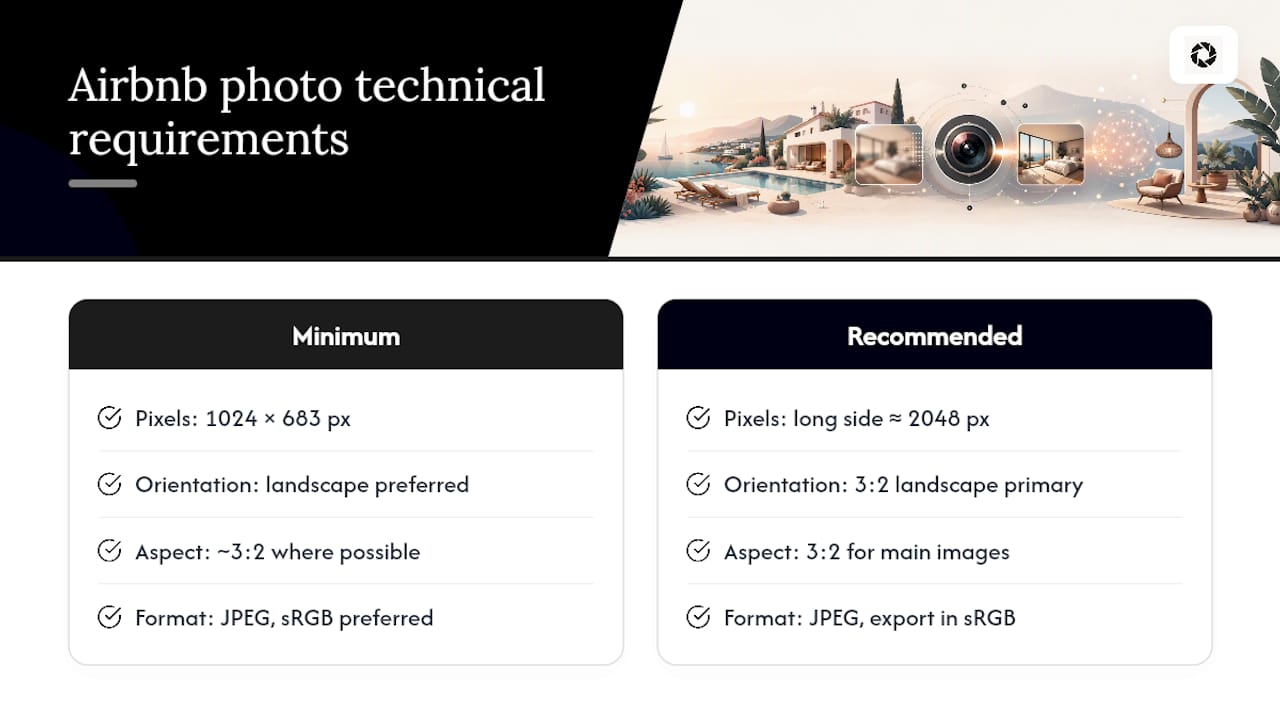
Experienced hosts and photographers who’ve spent years watching how Airbnb’s compression engine treats different file sizes recommend exporting with the long side near 2048 pixels. That extra resolution gives the platform’s compression algorithm more data to work with, so the final image holds detail instead of turning soft and blocky.
Stick with 3:2 landscape for your primary listing images. Vertical portrait shots might look striking on Instagram, but they get cropped or squeezed in Airbnb’s search thumbnails, and search thumbnails are where most guests decide whether to click at all.
On format: JPEG is the standard, and it should carry the sRGB color profile, not Adobe RGB or ProPhoto. sRGB is what nearly every phone screen and laptop display renders natively, so an sRGB export shows guests the true colors of your space instead of the muted or oversaturated tones that happen when a wide-gamut file gets misinterpreted by a browser.
File size is where the real judgment call comes in. A balance between file size and image quality matters more than absolute pixel count, because oversized files get aggressively recompressed on upload, sometimes losing more visible quality than a properly sized file would. Aim for something near or under 2 megabytes. A well exported 1.5 MB file at 2048 pixels usually looks sharper on the platform than a 12 MB file straight off a modern smartphone camera, because Airbnb has to do less destructive work to shrink the second one down.
How Should You Compose and Order Your Photos?
Your cover photo carries more weight than any other decision you’ll make with a camera. Choose the room guests most want to see before anything else, whether that’s a sun-drenched living room or a bedroom with a striking headboard. Shoot it in soft natural light, ideally within two hours of sunrise or sunset, and add one modest lived-in touch, a folded throw blanket, a book on the nightstand, without cluttering the frame. Shoot from about shoulder height or slightly lower rather than eye level standing straight up; it reads more spacious and shows floor-to-ceiling depth.
Once the cover is locked in, sequence matters. Airbnb’s photo tour tool sorts images into rooms automatically and lets you reorder the first five manually, so use that control. A working order that consistently performs well:
- Cover (best room, best light)
- Primary bedroom
- Kitchen
- Bathroom
- Secondary living space or a second bedroom angle
- Standout details (a fireplace, a view, a soaking tub)
- Neighborhood or exterior context
Putting the bathroom in position four isn’t arbitrary. Audits of host photo sequences show that surfacing the bathroom early defuses a guest’s unspoken worry about cleanliness before they’ve scrolled far enough to abandon the listing.
On volume, aim for roughly 22 photos, with 15 as your floor and 25 as your ceiling. Refresh the cover photo every 12 months and the bathroom photos every 6, since fixtures, grout, and lighting show wear faster than most hosts notice from the inside.
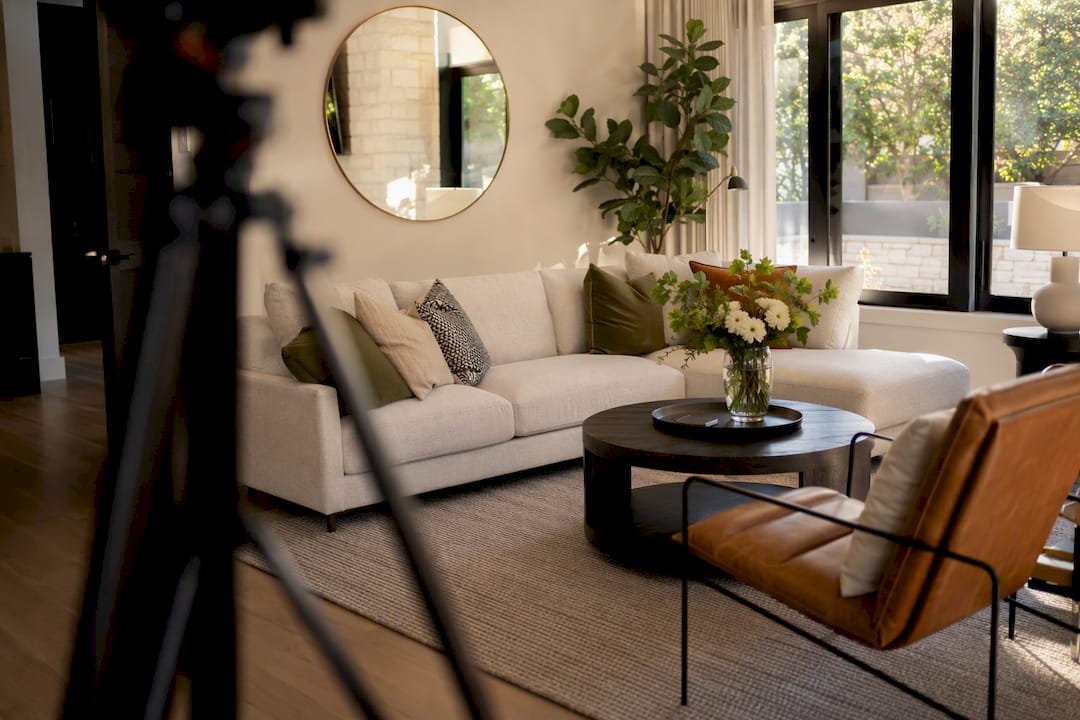
Pro Tip: Match color temperature across your whole set before uploading. A warm, yellow-lit bedroom next to a cool, blue-toned kitchen makes guests subconsciously distrust the whole listing, even if they can’t say why.
Declutter before you shoot, not after. Use a wide-angle lens carefully. Anything under 20mm on a full-frame equivalent tends to bow walls and stretch furniture in ways that mislead guests about scale, which creates the exact kind of trust problem you’re trying to avoid.
What’s the Right Export and Upload Workflow?
Consistency comes from a repeatable export routine, whether you’re working in Lightroom, Photoshop, or straight from a phone.
- Convert the color profile to sRGB before anything else.
- Set the long edge to approximately 2048 pixels.
- Export as JPEG at 80 to 90% quality, using “Save for Web” or an equivalent export preset rather than a default full-quality save.
- Cap file size around 1 to 2 MB as a secondary safeguard.
- Upload, then immediately check how the image renders on both desktop and mobile previews.
- Reorder your first five photos inside the photo tour tool if the automatic room sorting doesn’t match your intended sequence.
- Zoom out until the thumbnail is roughly 200 pixels tall and confirm it’s still readable at that size.
A note on the numbers: a reliable preset that photographers use is sRGB color profile, 2048 px long edge, JPEG quality 85, with a 2 MB file size limit as backup. That combination preserves enough detail to survive Airbnb’s compression pass without triggering the platform’s more aggressive recompression on oversized uploads.
If a photo looks blurry on desktop but fine on mobile, the file was probably too small to begin with, re-export at a larger long edge. If Airbnb rejects a file outright, check that it’s under any hard size cap and saved as a standard JPEG rather than HEIC or a raw format.
How Do You Add Accessibility and Alt Text to Your Photos?
Airbnb encourages hosts to add visual descriptions to help guests who are blind or have low vision understand what a photo shows. Keep each description to one short sentence: feature, location, scale. “Queen bed against a window wall in the primary bedroom” tells a guest more than “Nice bedroom.”
If your property has accessibility features, photograph them clearly and describe them the same way:
- Step-free entry, framed to show the threshold and any ramp incline
- Grab rails in the bathroom, shot close enough to confirm placement
- Wide doorways, captured with a person or object nearby for scale
These photos do double duty. They serve guests who need the information to book confidently, and they signal to every other guest that you’ve thought carefully about who can stay comfortably in your space, highlighting the importance of customer reviews in hospitality.
Should You Hire a Photographer, Shoot It Yourself, or Use AI Enhancement?
A professional shoot still wins for flagship launches, architectural properties, or any space where the existing photos are unusable, blurry, poorly framed, or missing rooms entirely. If you need new angles or you’re dealing with difficult lighting conditions on-site, a photographer’s judgment in the moment isn’t something software can substitute for.
But that’s not most hosts’ actual problem most of the time. Most of the time, you already have decent photos, taken by you, a co-host, or a cleaner walking through with a phone, and they just look dark, tilted, or a little cluttered. That’s a narrower problem, and it doesn’t require booking a shoot to fix.
This is where HospitalityLens fits. It’s an AI photo enhancement service built for exactly that gap: lighting and color correction, perspective and horizon straightening, clutter and object cleanup, all while preserving the real room. It does not add rooms, invent views, or generate amenities that don’t exist. You can try one photo free to see the enhancement before committing anything, and the preview comes watermarked so you can judge quality honestly before paying.
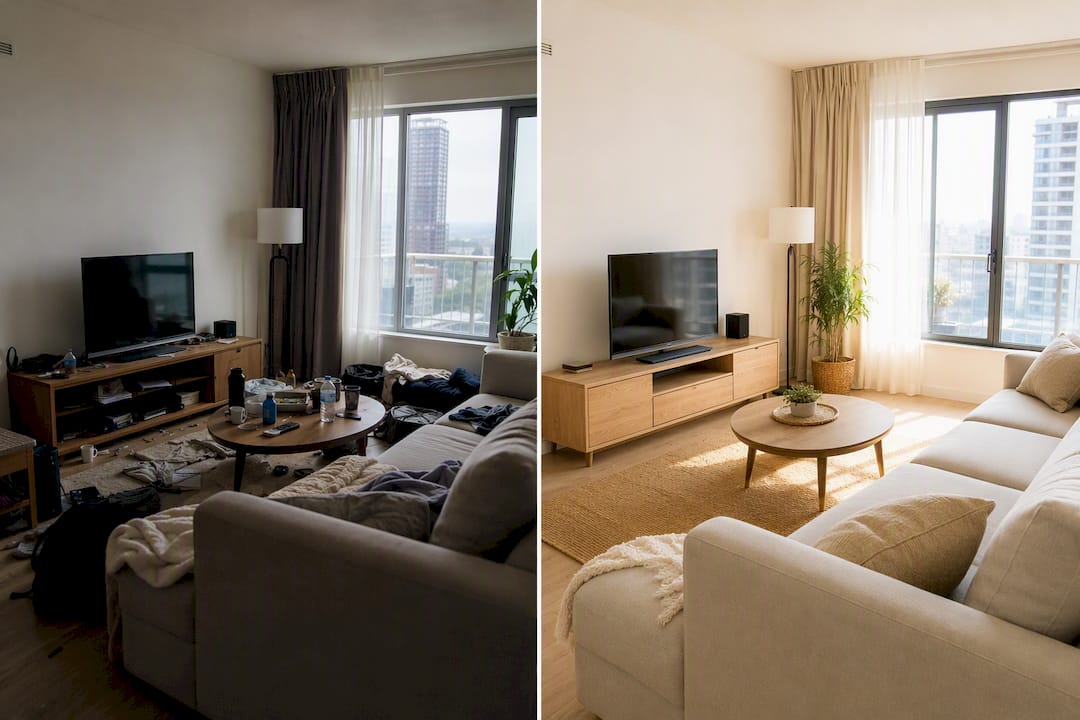
Pro Tip: Run your worst listing photo through an enhancement pass before you write it off. A dim kitchen or a tilted horizon is often a five-minute fix, not a five-hundred-dollar reshoot.
A quick way to decide:
- Photos are unusable or missing entirely: book a professional photographer.
- Photos are usable but flawed (dark, crooked, cluttered): enhancement is the faster, cheaper fix.
- You’re managing photo consistency across a portfolio of listings: a subscription-based photo editing plan for property managers keeps every listing looking like it belongs to the same brand.
Printable Checklist: Airbnb Photo Requirements at a Glance
Keep this nearby the next time you’re preparing an upload batch.
- Export in sRGB, JPEG format, 80 to 90% quality
- Long edge close to 2048 pixels; minimum 1024×683
- File size near 1 to 2 MB
- Cover photo readable and compelling at roughly 200 px thumbnail size
- Bathroom photo placed in position four
- Alt text written for every photo missing accessibility context
- Cover refreshed every 12 months; bathroom every 6
| Check |
Target |
| Minimum resolution |
1024 × 683 px |
| Recommended long edge |
~2048 px |
| File size |
~1 to 2 MB |
| Format and profile |
JPEG, sRGB |
| Photo count |
15 to 25 (aim ~22) |
| Cover refresh |
Every 12 months |
| Bathroom refresh |
Every 6 months |
A vacation rental photo standards guide is worth bookmarking if you’re managing this checklist across more than one property.
How Do You Upload Photos to Airbnb?
Start from your listing editor, either on desktop or the Airbnb app, and navigate to the Photos section. From there, Airbnb walks you through its photo tour setup, which sorts uploaded images by room type automatically once it detects enough visual context to categorize them.
Upload in batches rather than one at a time if you’re working from a laptop; drag-and-drop from a folder is faster and lets you see thumbnails side by side before committing. On mobile, you’ll select from your camera roll, and Airbnb will prompt you to tag each photo by room as part of the photo tour setup.
After the initial upload, confirm that every room has at least one photo before moving on. A photo tour with a gap, no kitchen shot, for instance, reads as a missing feature even if the kitchen is fine; guests assume the absence means something’s being hidden.
Once your photos are sorted, you’ll get the option to manually set your first five images, which is the set that appears in search results and at the top of your listing page. Take the extra sixty seconds here. The automatic sort is based on room detection, not on which photo actually sells the space best, so don’t assume the default order is your best order.
How Do You Edit or Rearrange Photos After Upload?
Nothing about your photo set is permanent once it’s live. Open your listing, go to the Photos tab, and you’ll see thumbnails in a grid you can drag and reorder directly.
To swap a weak photo for a better one, delete the old file and upload its replacement, then drag it into the same position in the sequence so your ordering logic (cover, bedroom, kitchen, bathroom) stays intact. Airbnb doesn’t currently offer in-platform editing tools beyond basic rotation, so any color correction, cropping, or straightening needs to happen before you upload the replacement.
This is also the point to revisit your accessibility descriptions. If you swap in a new photo of a step-free entry or a different bathroom angle, update the visual description attached to it rather than leaving the old caption in place, since a mismatched description is arguably worse than none at all.
Check your reordering on both platforms after you’re done. A sequence that looks correct in the desktop editor can occasionally render differently in the mobile app’s preview, particularly right after a batch edit, so give it a final look on your phone before considering the update finished.
Mobile vs Desktop: Which Should You Use to Upload?
Desktop gives you more control. Drag-and-drop batch uploads, a larger screen to judge composition and cropping, and an easier time comparing multiple versions of the same shot side by side before choosing which one makes the cut.
Mobile is faster for spot fixes. If you’re standing in the unit after a cleaner leaves and notice one bad photo, replacing it from your phone on the spot beats waiting until you’re back at a laptop. The Airbnb app also lets you preview exactly what guests see in the mobile search results, which matters because most bookings now happen on a phone screen, not a desktop monitor.
The smartest workflow uses both: shoot and do your first pass of curation and editing on desktop, where you can see fine detail and compare crops properly, then do a final mobile check before publishing to confirm your cover photo and thumbnail actually read well at phone size. A photo that looks sharp on a 27 inch monitor can still look muddy or oddly cropped in a 6 inch thumbnail, and that gap is exactly why the verification step matters more than which device you started on.
What Actually Moves the Needle on Airbnb Photos
Most photo advice for hosts treats every image as equally important, which is backwards. The cover photo and the first four positions in your sequence do most of the work; the remaining fifteen or so photos exist mainly to confirm the promise those first few images made. If you’re going to spend your effort anywhere, spend it there.
The bigger blind spot we see is technical, not creative. Hosts obsess over composition and staging, then export a photo at whatever size their phone or camera defaults to, and wonder why it looks worse on Airbnb than it did in their camera roll.
Where we’d push back on typical advice: you don’t need a full reshoot every time a listing underperforms. If your existing photos are structurally fine but poorly lit, crooked, or cluttered, a truthful enhancement pass solves the actual problem faster and cheaper than rebooking a photographer. Save the reshoot for when the underlying photos genuinely can’t be fixed.
— The HospitalityLens Team
Sources
FAQ
Is It Normal for Airbnb to Ask Hosts for a Photo?
Yes. Airbnb sometimes requests a profile photo or identity verification photo as part of standard account security, separate from your listing photos, and this is routine rather than a sign of a problem with your account.
What Is the 75 to 55 Rule on Airbnb?
This isn’t an official Airbnb policy or photo standard; it circulates informally among hosts referring to pricing or occupancy strategies, not photo requirements, so treat any reference to it with caution and check Airbnb’s own Help Center for current policy language.
What Can Get a Listing Disqualified from Airbnb?
Photos that include text overlays, watermarks, offensive content, or misleading images of rooms, views, or amenities that don’t exist can get a listing flagged or removed, alongside broader policy violations unrelated to photos.
Why Won’t Airbnb Let Me Upload a Photo?
Usually the file is too large, in an unsupported format like HEIC or RAW instead of JPEG, or below the platform’s technical requirements; re-export as a standard JPEG in sRGB, keep it near 1 to 2 MB, and try again.
Recommended