Photography Tips
Keep Listings Honest: Remove Objects From Photos for Property Managers
Enhance your property listings with honest photo edits, ensuring clarity and professionalism to attract more prospective tenants and bookings.
By Hospitality Lens · · 16 min read

Yes, you can remove objects from photos, and for most listing teams it’s the fastest fix available. The right method depends on scale: fix a single stray cord or bag yourself, hand occasional batches to an in-house editor, and route recurring, portfolio-wide cleanup to a specialized service like HospitalityLens. Each route works, as long as the edit stays truthful to the room.
TL;DR:
- Object removal is most effective when focused on the cover photo and first five images, as these significantly impact booking decisions.
- High-resolution, well-framed photos with corrected white balance and straightened horizons simplify edits and improve realism.
- Automated tools like AI masking or content-aware fill are suitable for complex removals, but shadows, reflections, and textures must be carefully checked afterward for consistency.
- Professional services are best for portfolios with frequent updates, offering quick turnaround times and consistent results at a per-photo cost that drops with larger batches.
- Reshooting is necessary for low-resolution images, missing key angles, or recent renovations, as editing cannot recover details or create genuine views.
Table of Contents
DIY, In-House, or a Service: Which Route Fits Your Portfolio?
The right choice comes down to how many photos you’re touching and how often you’re touching them.
DIY editing works when you’re fixing one photo, once. It’s free and immediate, but quality depends entirely on your skill with the tool, and there’s no second set of eyes checking for overedited shadows or a mismatched wall texture.
In-house editing makes sense for occasional, curated batches, maybe a seasonal refresh on a handful of units. You keep full control, but it eats staff hours that could go toward guest communication or new listings, and consistency slips as different people edit different properties.
A specialized service earns its cost at portfolio scale, when you’re onboarding new units regularly or refreshing dozens of listings at once. You trade a per-photo fee for speed, consistency, and someone else owning the quality-control step.
- DIY: lowest cost, slowest at volume, highest risk of inconsistent results across units
- In-house: moderate cost, better quality control, doesn’t scale without adding headcount
- Managed service: predictable per-photo cost, fastest turnaround at scale, built-in consistency across a portfolio
Pro Tip: Before removing anything, ask whether a guest would be surprised by its absence at check-in. If the answer is yes, the edit has crossed from cleanup into misrepresentation.
How Do You Prepare Photos Before Removing Objects?
Good prep cuts editing rounds in half. Start with the photos that matter most: the cover image and the first five in your gallery carry outsized weight in booking decisions, so prioritize those for cleanup before touching the rest of the gallery.
- Pick your priority shots. Cover photo first, then the next four in sequence. These drive the bulk of booking decisions, so any editing budget goes here first.
- Check resolution and framing. Upload at high resolution, ideally landscape orientation, since platforms compress images on display and low-res source files show artifacts fast.
- Straighten before you shoot, not just after. Level the camera. It’s easier to nudge a slightly crooked horizon in editing than to rebuild a badly skewed perspective.
- Physically declutter first. Move the trash can, unplug the visible charging cord, tuck away personal items. Removing clutter before the camera clicks beats fixing it in post every time.
- Note what must stay. If a feature is unusual but real, like a quirky light fixture, flag it so an editor doesn’t “fix” something that’s actually a selling point.
What’s the Right Workflow for Removing Objects Without Breaking Realism?
Treat object removal as a sequence, not a single click. Skipping steps is how edits start looking fake.
Start with a keep/remove list for each photo. Write down exactly what comes out (a laundry basket, a cable, a guest’s shoes by the door) and what must stay untouched (layout, fixtures, view). This list is your guardrail against fabricating anything, whether that’s inventing an amenity or altering a room’s actual footprint.
Fix the whole image before touching individual objects. White balance, exposure, and vertical alignment come first. Industry checklists consistently point to these three corrections as the difference between an acceptable photo and a good one, and skipping them means every object-removal edit afterward sits on a flawed base.
Once the global fixes are done, move to removal itself:
- Content-aware fill works well for small, isolated objects against a simple background, like a phone charger on a nightstand.
- Clone and heal tools suit textured surfaces, tile grout, wood grain, where you need to match a pattern rather than blend a flat color.
- AI masking and patching handles more complex removals, like a person walking through a shot or a cluttered counter with overlapping items, because it can rebuild texture and shadow together instead of patch by patch.
After removal, check the surrounding area. Shadows should still fall in a consistent direction. Reflections in windows or mirrors need to match what’s actually in the room now. A patched-over object that leaves a shadow behind is the fastest way to make an edit look wrong.
Export at the resolution and aspect ratio your platform recommends, then run a final check: does the photo still look like the room a guest will walk into? If yes, publish. If you’re unsure, that hesitation is the signal to slow down.
Pro Tip: *Zoom to
on the edited area before exporting. Most overedited patches look fine at thumbnail size and fall apart the moment a guest zooms in on the listing.*
When Should You Book a Photographer Instead of Editing?
Some problems can’t be solved with cleanup, and pretending otherwise costs more than a reshoot would.
- The photo is low resolution or blurry, no amount of editing recovers detail that was never captured
- You’re missing a key angle entirely, like a primary bedroom or the kitchen’s working triangle
- The space has complex or mixed lighting that no amount of correction balances naturally
- You’ve just finished a renovation or the unit is launching for the first time
- The “fix” would require inventing something, a wall that isn’t there, a view that doesn’t exist
As a general cadence, plan a full reshoot every two to three years, or immediately after any renovation or amenity change. The simplest operational rule: if an edit would require fabricating a feature, stop editing and schedule a shoot instead. When you reach that point, a property photographer directory is the faster way to find someone qualified for the specific property type.
How HospitalityLens Handles Object Removal and Cleanup
Free watermarked preview. Pay only if you like it. No card is required to create the free watermarked preview. See current pricing for unlocks, one-time packs, and subscriptions.
The scope is deliberately narrow: lighting and color correction, perspective and horizon straightening, clutter and object removal, general polish. Nothing gets invented. No new rooms, no fabricated views, no amenities that aren’t actually there.
- Best fit: multi-listing managers and co-hosts who need fast, consistent onboarding for new properties
- Also useful for: seasonal refreshes and portfolio-wide consistency checks across dozens of units
- Not the right tool for: properties needing new angles, architectural shots, or photos that don’t exist yet
Subscribers can add extra photos beyond their tier at $5, $4, or $3 per photo, each with three revisions.
How Lighting and Color Correction Fit Into Cleanup
Object removal rarely stands alone. Pull a lamp cord out of frame and the shadow it cast is still wrong unless the lighting pass catches it too.
White balance comes first. A photo shot under mixed lighting, daylight through a window plus a warm indoor lamp, creates a color cast that makes a room look dingy even when it’s clean. Correcting that cast should happen before any object removal, because it changes how patched areas need to blend.
Color richness matters more than most teams assume. Research on short-term rental photos found that color richness negatively correlates with booking intent, meaning an overly saturated, busy-looking photo can actually suppress bookings, while calmer, more consistent tones perform better. That same research found visible household and leisure items, when color is controlled, correlate positively with bookings. A tidy kitchen counter with a coffee maker visible reads as lived-in and welcoming. A counter cluttered with mismatched colors and objects reads as chaotic.
Practically, this means your color grading pass should aim for consistency across the gallery, not maximum vibrance in any single shot. A guest scrolling through ten photos notices when one looks warm-toned and the next looks cool. Match white balance across the set before you publish, and treat color correction as a portfolio-level task, not a photo-by-photo guess.
Comparing Software Options for Object Removal
The tool that works for a single photo rarely scales to a portfolio, and that gap trips up a lot of teams.
Desktop editors like Adobe Photoshop offer the most control: layer-based content-aware fill, precise clone and heal brushes, and fine-grained masking. The tradeoff is a real learning curve. Getting a clean result on a textured surface, patterned tile, wood grain, takes practice, and a rushed edit shows.
Adobe Lightroom handles global corrections well (exposure, white balance, straightening) but its object-removal tools are lighter than Photoshop’s, better suited to small blemishes than complex removals.
Mobile apps trade power for speed. They’re fine for a quick fix on one photo, pulling a stray shoe out of a hallway shot, but most struggle with complex backgrounds and can leave visible smudging on textured surfaces.
AI-driven services built specifically for property photos sit in a different category entirely. Instead of a general-purpose tool you have to master, you’re using a workflow tuned for the specific failure modes of listing photos: matching shadows on hardwood, preserving window reflections, keeping wall texture consistent after a patch. For a single photo, the desktop tools are fine. For a portfolio of fifty listings needing the same kind of cleanup, consistency across the whole set matters more than any one tool’s ceiling, and that’s where a dedicated service usually outperforms a general editor operated under time pressure.
How Do You Keep Edited Photos Looking Real?
A few habits keep results honest.
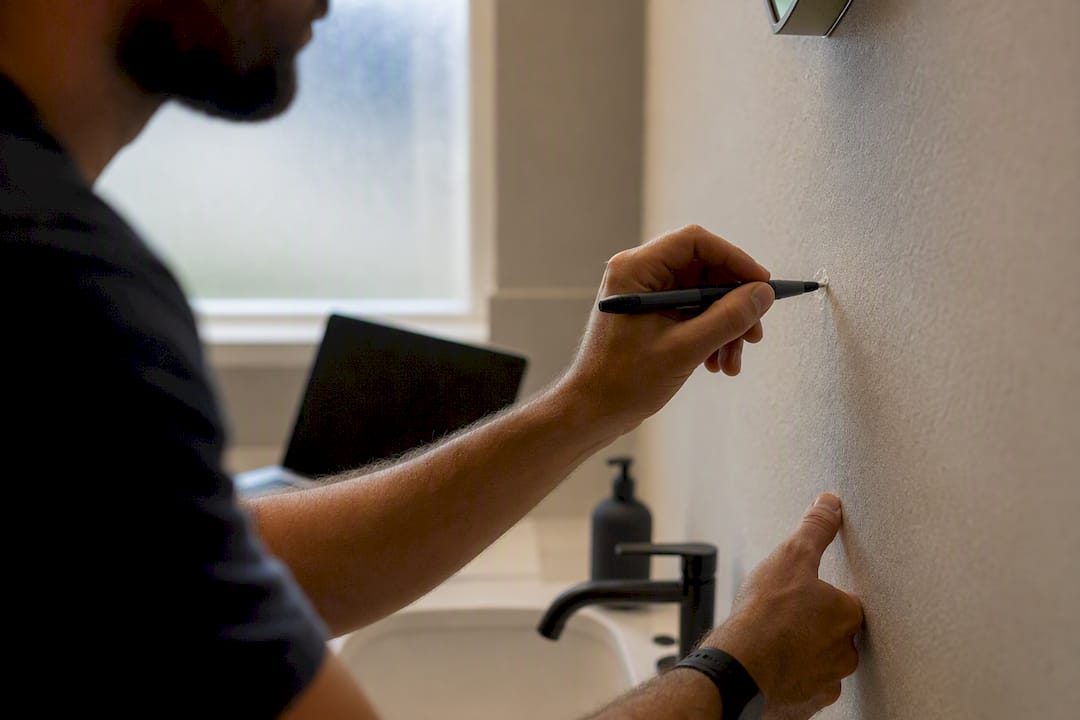
Check texture continuity first. When an object is removed from in front of a patterned surface, tile, carpet, brick, the pattern needs to continue logically, not repeat in an obvious loop or blur into a smudge.
Match lighting direction across the whole frame. If a shadow falls left of every object in a room, a patched area with no shadow, or one falling the wrong direction, is the fastest tell that something was edited.
Keep your revisions focused. Most services, HospitalityLens included, cap revisions per photo (two to three, depending on plan), which pushes you to be specific about what needs fixing rather than requesting broad, repeated passes that risk over-processing a single image.
Compare before and after side by side before publishing, at full size, not just the thumbnail. Ask the same question every time: does this still look like the property a guest will actually walk into? If a returning guest or a cleaner who’s been in the unit would look at the photo and say “that’s not quite right,” the edit went too far.
What Goes Wrong During Object Removal, and How Do You Fix It?
A few problems come up often enough to plan for them ahead of time.
Mismatched shadows are the most common tell. When an object is removed but its shadow remains faintly visible, or the surrounding shadows don’t align with the room’s actual light source, the fix is to rework the shadow direction to match the dominant light in frame, not just erase the object and hope.
Texture smearing happens on patterned or textured surfaces, especially with fast, low-effort tools. Carpet, wood grain, and brick are the usual trouble spots. The fix is patience: clone from a matching section of the same texture rather than letting an automated fill guess.
Reflections left behind in mirrors, windows, or glossy countertops are an easy miss. If you removed a person or object from the room but their reflection is still visible in a window across the frame, the edit isn’t finished.
Over-smoothing is a subtler problem. In trying to erase clutter cleanly, some tools soften nearby texture too, leaving a patch that looks airbrushed next to natural grain or fabric. Check zoomed-in crops of every edited area before calling it done.
Color drift between the edited area and the rest of the photo shows up when white balance correction happens after, rather than before, object removal. Doing the global color pass first avoids this almost entirely.
DIY vs. Professional Editing: How Much Time Does Each Take?
Time is the variable most teams underestimate when they decide to handle edits themselves.
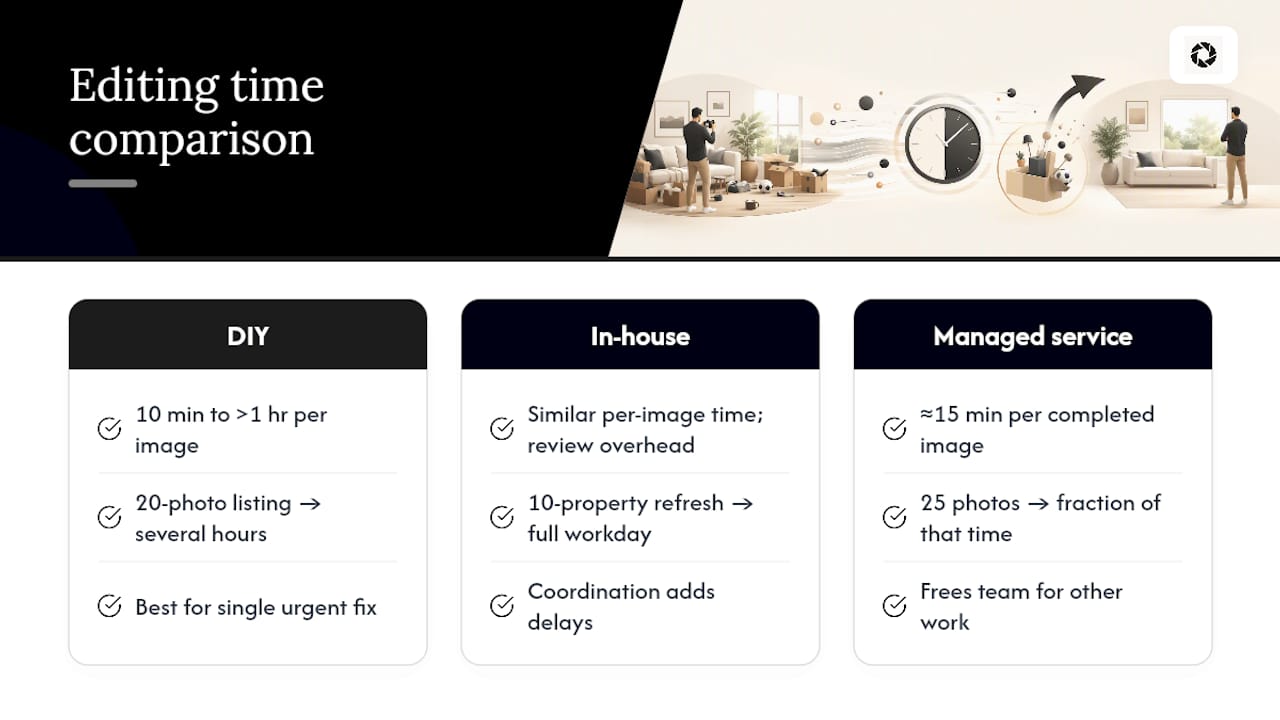
A single DIY object removal, done competently in Photoshop or Lightroom, takes anywhere from ten minutes for a simple isolated object to over an hour for a complex scene with multiple items, tricky lighting, or a textured background that needs careful cloning. Multiply that across a twenty-photo listing and a weekend project turns into several hours, before you’ve touched the color grading pass.
In-house staff editing follows a similar curve but adds coordination overhead: someone has to review the batch, flag rejects, and send it back for another pass. A portfolio-wide refresh across ten properties can easily consume a full workday for one staff member.
A managed service compresses that timeline substantially because the workflow is already built for this exact task. HospitalityLens targets a turnaround built for booking-ready photos in around 15 minutes per completed image, which means a batch of twenty-five photos can move through the pipeline in a fraction of the time a manual in-house pass would take, freeing your team to handle guest communication or new listings instead.
The tradeoff is cost per photo versus cost per hour of staff time. For a single urgent fix, DIY wins on speed. For anything beyond a handful of photos, the math tips toward a service almost every time.
The Real Cost of an Edit That Looks Too Good
Small, honest edits pay off over time. Straighten the horizon, clear the counter clutter, correct the color cast, and bookings tend to hold steady without an uptick in accuracy complaints at check-in.
The test we’d apply to any edit: if it would surprise a guest standing in the doorway, it doesn’t belong in the listing. That’s not a legal line, it’s a trust line, and trust is what keeps a listing’s review score intact after the booking closes.
For teams managing dozens of units, the highest-leverage move isn’t perfecting every photo. It’s fixing the cover photo and the first five images correctly, since those carry most of the booking decision. Get that right across your portfolio before worrying about photo twelve in the gallery. Guest experience research on smooth operational handoffs makes a similar point in a different context: the moments guests notice most are the ones worth getting exactly right, and everything else matters less than you’d think.
— The HospitalityLens Team
Try One Photo Free Before You Commit to a Batch
If you’ve read this far, you already know the tradeoffs: DIY costs time, in-house editing costs staff hours, and neither scales cleanly once you’re managing more than a few listings. HospitalityLens gives you a third option built specifically for that scaling problem.

Free watermarked preview. Pay only if you like it. No card is required to create the free watermarked preview. See current pricing for unlocks, one-time packs, and subscriptions.
This works best when you already have usable phone or listing photos that need cleanup, not a property that’s never been photographed. If you need new angles or architectural-level shots, browse the property photographer directory instead. Otherwise, try one photo free and see what a fifteen-minute turnaround actually looks like.
Sources
Claims in this article draw on peer-reviewed research on listing photo effects, structural modeling of photo layout impact, and industry benchmarking on booking rate and photo standards. Practical checklists also reference HospitalityLens’s guide to clutter removal and its 2026 property photo best-practices roundup.
FAQ
Can I Legally Remove Objects From My Listing Photos?
Yes. Removing clutter, personal items, or trash from your own listing photos is standard practice and not a legal issue, as long as you don’t fabricate rooms, views, or amenities that don’t exist.
How Long Does Object Removal Take Per Photo?
A simple DIY removal takes ten to twenty minutes; complex scenes can take over an hour. A managed service like HospitalityLens targets a turnaround of around 15 minutes per completed photo once submitted.
Will Removing Objects Make My Photos Look Fake?
Not if you preserve shadows, textures, and reflections during the edit. Overuse of automated fill tools without checking these details is the most common cause of an unrealistic result.
What’s the Difference Between Object Removal and Virtual Staging?
Object removal cleans up what’s already in the room, cords, clutter, trash. Virtual staging adds furniture or features that aren’t there, which HospitalityLens does not do.
How Much Does Professional Object Removal Cost Per Photo?
Current HospitalityLens pricing (USD); one-time packs — The Hero: 1 photo for $12; The Refresh: 10 photos for $59; The Property: 25 photos for $129; The Portfolio: 100 photos for $399; monthly subscriptions — THE STARTER: 10 photos/month for $49/month; THE OPERATOR: 25 photos/month for $99/month; THE PORTFOLIO: 100 photos/month for $299/month; one-time pack credits do not expire; monthly subscription credits remain valid for up to 3 months; 2 free revisions per photo on one-time packs; 3 free revisions per photo on monthly subscriptions. See current pricing.
When Should I Book a Photographer Instead of Editing?
Book a reshoot when photos are low resolution, missing key angles, or when the property just underwent a renovation, since editing can’t recover detail or angles that were never captured.
Recommended