Photography Tips
How to Remove Window Glare Without Blacking Out the Room
Effortlessly eliminate window glare and enhance viewing comfort with smart positioning and inexpensive solutions, keeping your room bright and inviting.
By Hospitality Lens · · 15 min read
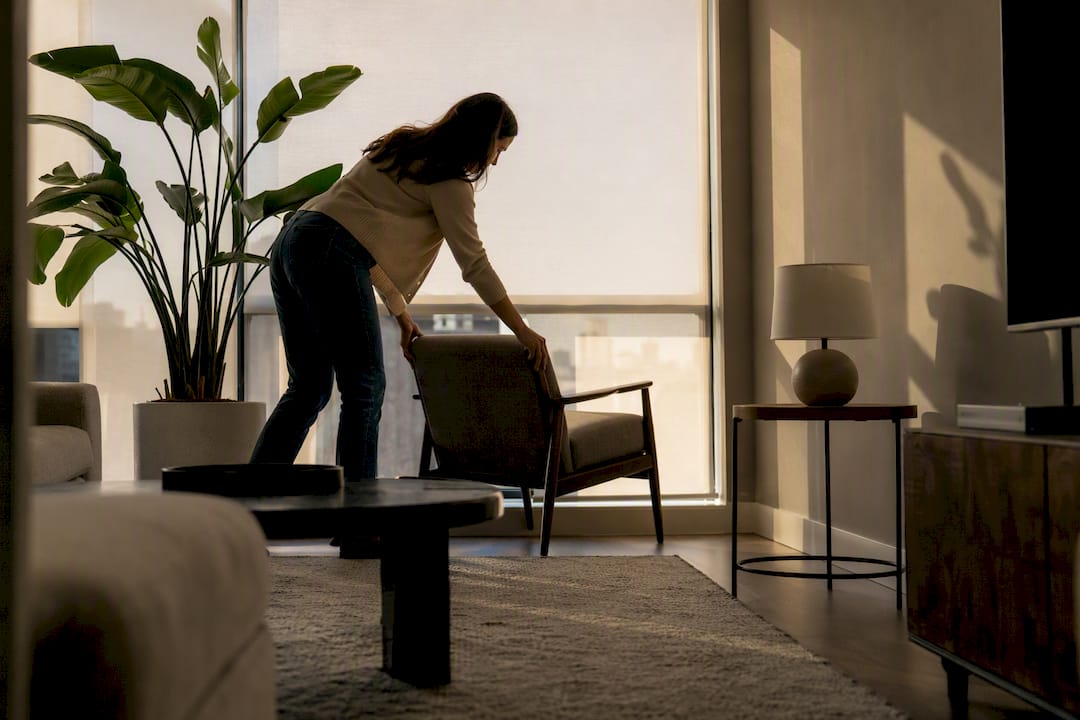
Move your screen or camera so the window sits to the side instead of behind you. That single move, paired with a slight downward tilt, solves most everyday glare problems before you spend a dollar on film or shades.
- Reposition first: put the window at 3 or 9 o’clock relative to your screen (the 90-degree rule).
- Micro-tilt: angle a monitor 2 to 5 degrees down to redirect reflections away from your eyes.
- Soften as backup: a sheer curtain or solar shade helps when you can’t move the desk or camera.
For photos, press the lens against the glass or shut off interior lights before you shoot. If you’re stuck with unusable listing photos after trying these, HospitalityLens can enhance the images you already have without a new shoot.
Key Takeaways
Removing window glare works best when you fix geometry and room brightness first, and treat film, coatings, or editing as backup layers rather than the first move.
| Point |
Details |
| Reposition before you buy |
Use the 90-degree rule and micro-tilt screens 2 to 5 degrees down before considering film or shades. |
| Balance room brightness |
Brighten walls, ceilings, and lighting to close the contrast gap with the window, per FSEC guidance. |
| Choose treatments by VLT |
Lower VLT or openness factor cuts glare but also dims the room, so match the film to the room’s use. |
| Capture beats editing |
Reposition, press lens to glass, or use a polarizer before relying on reflection removal software. |
| HospitalityLens for stuck photos |
When a listing photo still shows distracting glare after capture fixes, HospitalityLens offers truthful enhancement starting with one free preview. |
Table of Contents
Why Position Beats Purchase: The 90-Degree Rule and Micro-Tilt
Most people reach for anti-glare film or a new set of blinds before they’ve tried the free fix: geometry. Light reflects off glass and screens at predictable angles, and once you understand that, you can usually solve the problem by moving furniture instead of buying anything.
The 90-degree rule is the foundation. Set your monitor, TV, or desk so the window falls to your side rather than directly ahead or behind you. This keeps the brightest light source out of your direct line of sight and stops it from bouncing straight into your eyes off the screen.
Here’s a simple sequence to work through, in order:
- Rotate the desk or seating so the window sits at 3 or 9 o’clock instead of 12 or 6.
- Micro-tilt the screen 2 to 5 degrees downward. This small adjustment redirects reflected light toward the floor instead of your face.
- Run the black-mirror test. Turn the screen off and look at what’s reflected. Anything you can see in the dark glass is a glare source you still need to address.
- Soften the window with a sheer, shade, or blind only if the first three steps don’t fully solve it.
For TVs, the same logic applies: rotate the unit, adjust seating distance, or raise and angle the mount to break the direct reflection path. According to Worknest Studio’s glare fix guide, fixing the order matters. Angle and tilt handle most monitor glare before any product purchase becomes necessary.
Pro Tip: After you tilt or reposition, move your head 10 to 15 centimeters left and right. If glare disappears at one head position but returns at another, the fix isn’t stable yet. Keep adjusting until it holds across normal movement.
Window Treatments That Actually Cut Glare
When repositioning isn’t enough, the fix moves to the glass itself. Two numbers matter here: visible light transmission (VLT) and openness factor. VLT measures how much visible light passes through a film or fabric. Openness factor describes how much a woven shade lets through versus blocks. Lower numbers on either mean less glare, but also a dimmer room and a more muted view. There’s no way around that trade-off. It’s a dial, not a switch.
Film comes in a few flavors worth knowing apart:
- Darker tints cut light broadly but change the room’s color cast and reduce night visibility outward.
- Spectrally selective films target infrared and UV wavelengths while preserving more visible light, so you get heat and glare control without darkening the room as much.
- Reflective films bounce more light back outside, which helps with both glare and privacy during the day but can create a mirror effect at night.
For interiors, light-filtering solar shades, adjustable blinds, and layered drapery reduce glare while keeping some daylight. Bedrooms and media rooms are the exception. There, blackout or room-darkening options make more sense than anything that preserves a view. Living rooms often do best with a layered combination: a solar shade for daytime, paired with drapery for evening privacy and softer light.
Outside the glass, awnings, pergolas, roof overhangs, and even strategic landscaping block sun before it ever reaches the window. This is often the most effective heat and glare control available, since it stops the light at the source rather than filtering it after it’s inside.
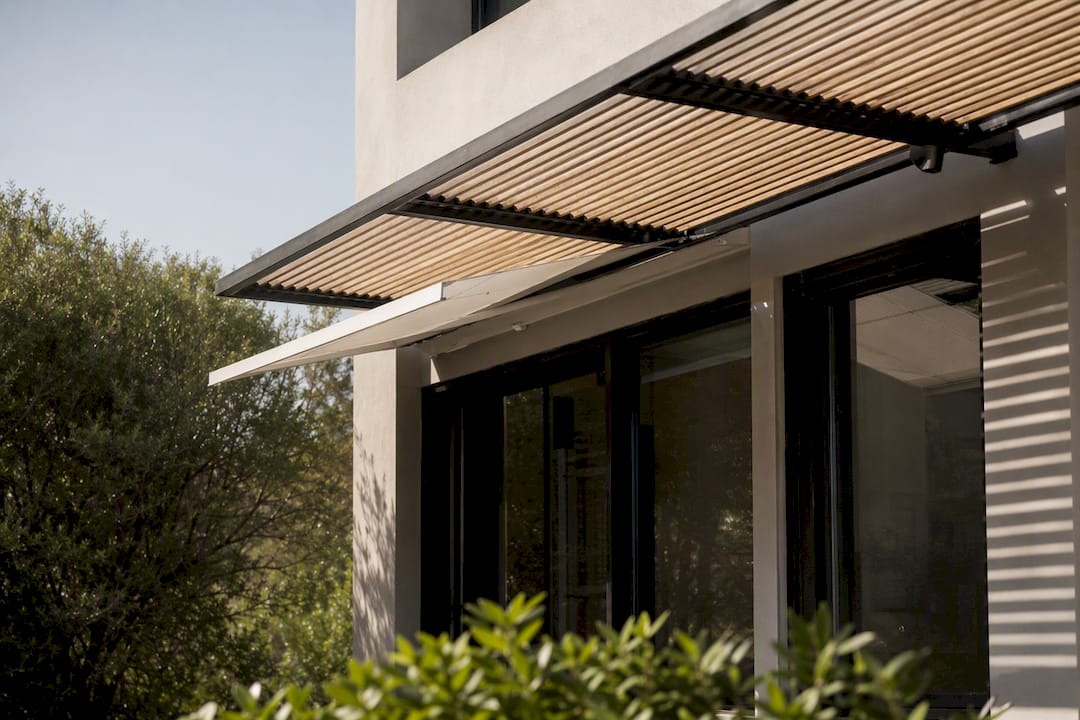
One caution: don’t pick a film based on how it looks from the street. A film that looks great from outside might tint everything green indoors or kill your view at dusk. For anything beyond a single window, a professional consult saves you from an expensive redo.
Change the Room, Not Just the Window
Glare isn’t only a window problem. It’s a contrast problem between the window’s brightness and everything around it. The Florida Solar Energy Center’s glare research frames it exactly this way: reducing glare often means brightening the room, not just darkening the glass.
A dim room with one blazing bright window creates a harsh contrast your eyes struggle to adjust to. Even a modest bump in ambient light narrows that gap and makes the window feel less aggressive.
A few practical moves help here:
- Repaint walls and ceilings in higher-reflectance finishes to bounce more light around the room evenly.
- Choose lighter flooring where you can, since dark floors absorb light that could otherwise be balancing the window.
- Add diffuse ambient lighting rather than a single bright spotlight, which just creates a second competing glare point.
- Stick to matte or low-sheen finishes on furniture and nearby surfaces to cut down on secondary reflections.
Pro Tip: If you’re photographing a room for a listing, don’t fight the window with one harsh lamp. Spread two or three softer light sources around the space instead. This closes the brightness gap the camera struggles with far better than a single strong bulb.
There’s an energy trade-off worth naming: running more interior lighting during the day costs something. For most rooms, a modest film plus a few interior tweaks beats either extreme. Heavy tinting alone leaves the room dim; extra lighting alone leaves the glare untouched.
Practical Photography Fixes: What Capture and Editing Can Actually Do
Every reflection you avoid at capture is one you never have to fix later, and some reflections simply can’t be fixed later. Work through these in order before you touch an editing tool:
- Change your position or angle. A few steps to the side often eliminates a reflection completely.
- Press the lens to the glass when it’s safe to do so. A rubber eyecup or lens hood pressed flush against the window removes the air gap that causes double reflections. This does narrow your field of view, so it works better on wider scenes than tight crops, and skip it on windows with delicate coatings.
- Use a circular polarizer when your angle allows it. It cuts reflections effectively at certain angles to the glass, though it can shift color slightly and won’t help if the reflection is already blowing out the sensor.
- Turn off interior lights to darken the room relative to the outside view, which reduces what the glass has to reflect back at you.
For photos where reflections still remain, Adobe’s Reflection Removal tool in Camera Raw handles many cases well.
Reflection Removal works best on plate glass that fills most of the frame, and it has real limits. It struggles when highlights are clipped or when the reflection is small and distant, because there’s no image data left to reconstruct.
That’s a meaningful distinction. If a reflection has blown out the highlights in your shot, no software can invent detail that was never captured. This is exactly why the capture-first order matters more than any editing shortcut. If you’ve tried the geometry fixes and still have a distracting glare problem in a listing photo you need for booking platforms, HospitalityLens can apply truthful enhancement to the image you already have. You can try one photo free to see what’s realistically fixable.
When Editing and Capture Aren’t Enough for Listing Photos
Sometimes the glare is baked into a photo you’re stuck using: a cleaner took it, an owner submitted it, or it’s the only shot you have of a room before the next guest checks in. HospitalityLens exists for exactly that gap. It applies lighting and color correction, perspective and horizon correction, clutter cleanup, and general visual polish to real photos you upload, without inventing rooms, views, or amenities that aren’t there.
The process is straightforward:
- Upload a photo and get a free, watermarked preview.
- If you’re satisfied, pay $12 for the completed, watermark-free version, which includes two revisions.
Current HospitalityLens pricing (USD); one-time packs — The Hero: 1 photo for $12; The Refresh: 10 photos for $59; The Property: 25 photos for $129; The Portfolio: 100 photos for $399; monthly subscriptions — THE STARTER: 10 photos/month for $49/month; THE OPERATOR: 25 photos/month for $99/month; THE PORTFOLIO: 100 photos/month for $299/month; one-time pack credits do not expire; monthly subscription credits remain valid for up to 3 months; 2 free revisions per photo on one-time packs; 3 free revisions per photo on monthly subscriptions. See current pricing.
A photo with a glare-washed window isn’t a lost cause. It’s usually a lighting and contrast problem that truthful enhancement can address, as long as the underlying room is still visible in the source image.
A professional photographer is still the better call for flagship property launches, shoots that need entirely new angles, or situations where the source photo is so blown out or crooked that there’s nothing usable to work with. For everything else, particularly brightening interior listing photos that have a mix of good composition and a glare problem, this is where HospitalityLens fits.
Do Anti-Reflective Coatings Actually Work on Windows?
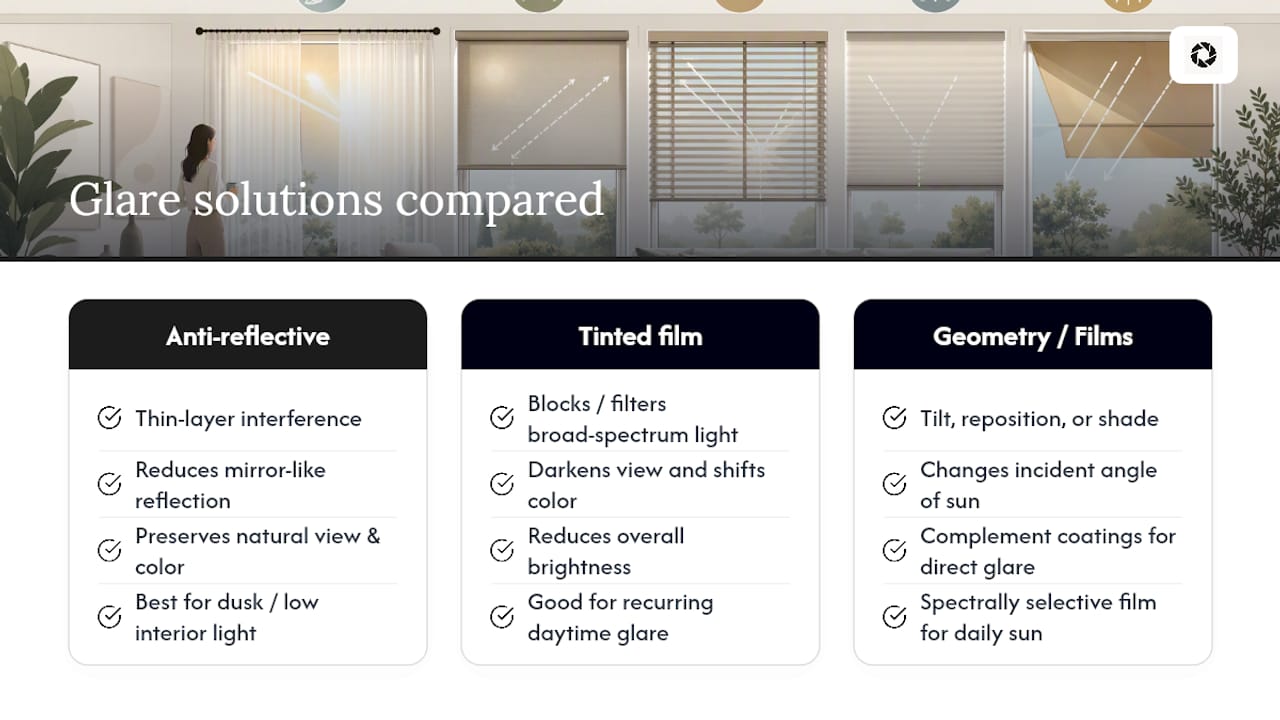
Anti-reflective coatings work differently than tinted film. Instead of blocking light, they use thin-layer interference to cancel out reflected wavelengths, which is the same principle used in eyeglass lenses and museum display glass. Applied to a window, the coating reduces the visible “mirror” effect you get from certain angles, particularly at dusk or in low interior light when a window can turn into a reflective black panel.
The trade-off is subtler than with tinted film. Anti-reflective coatings preserve more of the natural view and color accuracy than a dark tint would, since they’re not filtering broad-spectrum light so much as managing how it reflects. That makes them a reasonable option for anyone prioritizing a clear, glare-free view over a change in indoor brightness or color cast.
They’re not a universal fix, though. Coatings reduce surface reflection at oblique angles better than they eliminate the harsh, direct glare of full sun hitting a screen or camera lens straight on. For that kind of glare, you’re still better served by the geometry fixes covered earlier, or by a spectrally selective film if the glare is a recurring daily problem. Anti-reflective coatings tend to work best as a complement to positioning fixes, not a replacement for them. If a room’s main issue is a mirror-like window at night rather than blinding midday sun, a coating is worth the investment. If the issue is direct afternoon sun hitting a monitor, tilt and reposition first.
Clean Windows, Clearer View: Maintenance That Cuts Glare
A streaked or dusty window scatters light in more directions than a clean one, and that scatter is exactly what reads as extra glare. Dirt, hard water spots, and smudges each catch and bounce light unpredictably, which is why a window that’s merely dirty can look worse for glare than one that’s simply uncoated.
A few habits keep this from creeping up on you. Clean windows on both sides regularly, since interior smudges and exterior grime both contribute separately to visible haze. Use a squeegee or microfiber cloth rather than paper towels, which tend to leave lint and streaks that catch light at an angle. Avoid ammonia-based cleaners on tinted or coated glass, since they can degrade film adhesive and coating layers over time, ironically making glare worse in the long run.
For rental properties and listings, this maintenance step matters more than it seems, as detailed in Why Mobile Bars Suit Hotel Ballrooms: A Planner’s Guide. A photo taken through a streaky window shows up as haze or unexpected bright spots that no amount of repositioning fixes at the shoot stage. If you’re preparing a space for photos, clean the glass first, then apply the geometry and lighting fixes covered earlier. It’s a five-minute step that prevents a problem you’d otherwise have to fix in post.
What Most Glare Advice Gets Backward
Most guides on this topic lead with products: buy this film, install these shades, get a polarizer. The research tells a different story. Geometry and luminance balance solve the majority of everyday glare complaints, and they cost nothing. Film and coatings are real tools, but they’re the third or fourth move, not the first.
The conventional advice also tends to treat glare as purely a window problem. It isn’t. A dim room with one bright window will feel glaring even with excellent film installed, because the contrast between the window and everything around it hasn’t changed. Fix the room’s brightness first, then decide if the glass still needs help.
For hospitality teams specifically, this matters because so much glare frustration in listing photos comes from lighting choices made at the shoot, not the window itself. If you’ve already tried the capture fixes and a photo still isn’t usable, that’s a narrower, more solvable problem. Truthful enhancement can close that gap without pretending the room is something it isn’t.
A Faster Way to Fix Glare in Photos You Already Have
If your listing photos have a glare problem you can’t shoot your way out of, and hiring a photographer for a full reshoot feels like overkill for one or two rough images, HospitalityLens gives you a middle path. Upload the photo you already have, whether it came from a cleaner, an owner, or your own phone, and get a professionally enhanced version without scheduling anyone or waiting for a shoot window.

Free watermarked preview. Pay only if you like it. No card is required to create the free watermarked preview. See current pricing for unlocks, one-time packs, and subscriptions.
Sources
FAQ
What Can I Put Over Windows to Reduce Reflectiveness?
Sheer curtains, solar shades, and spectrally selective window film all cut reflectiveness while letting some light through. For a more permanent fix, anti-reflective coatings target the mirror effect specifically without darkening the glass much.
What Are Three Ways to Reduce Glare Through a Window or Screen?
Reposition your screen or seating so the window sits to the side, micro-tilt the screen a few degrees down, and add a light-filtering shade if repositioning alone doesn’t fully solve it.
Can Glass Be Made Non-Glare?
Yes, through anti-reflective coatings, spectrally selective film, or exterior shading like awnings and overhangs that block direct sun before it reaches the glass. No single option eliminates all glare in every lighting condition, so most rooms benefit from combining two approaches.
How Do I Make Window Glare Go Away in Photos?
Change your position first, press the lens to the glass if it’s safe, and try a polarizer before turning to editing tools. If a listing photo still shows distracting glare after those steps, HospitalityLens can enhance the usable image you already have starting with a free preview.
Is Window Film Worth It If I Already Use Blinds?
Yes, for windows with daily direct sun. Film handles glare consistently throughout the day, while blinds require manual adjustment as the sun moves, so layering both gives you steadier control than either alone.
Recommended