Photography Tips
Lighting for Room Photos: Practical Setups That Work
Master practical lighting setups and techniques to consistently capture stunning room photos, enhancing your property's appeal and saving time on reshoots.
By Hospitality Lens · · 24 min read
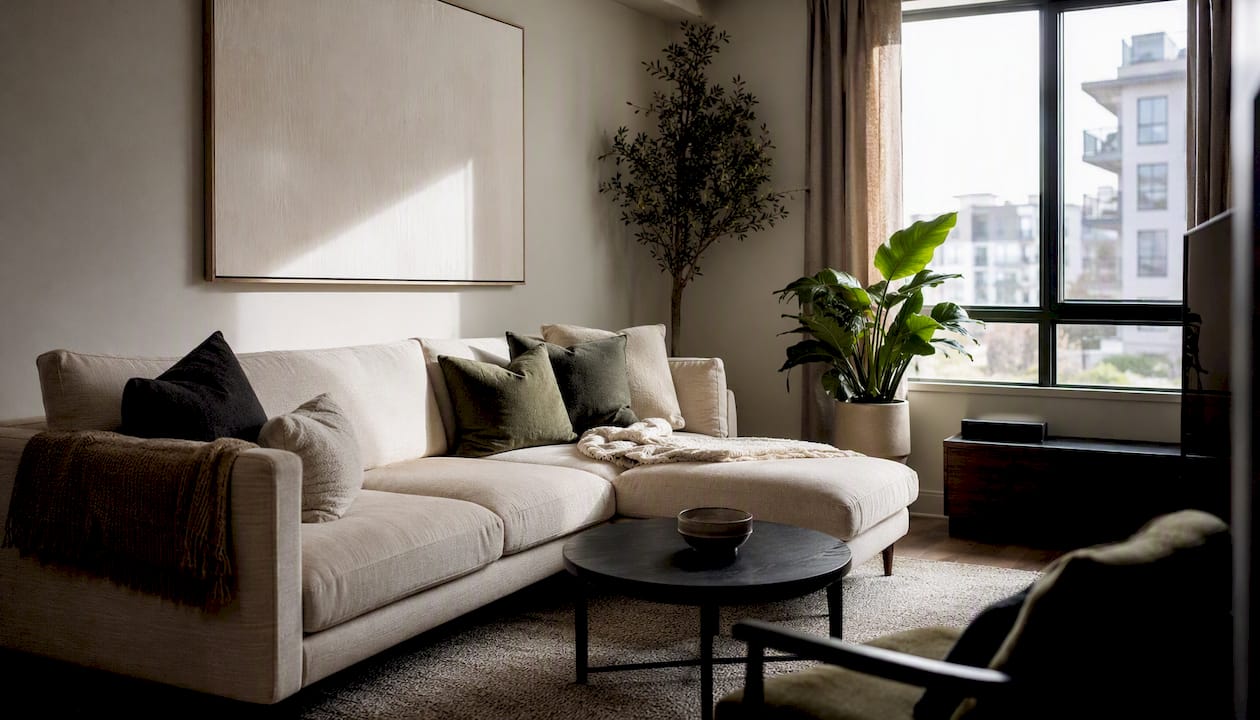
The fastest route to reliable room photos is diffused window light, a tripod, and a matched color temperature. Get those three right and most rooms photograph well without additional gear.
Before you read further, here are three things you can do right now:
- Turn off all overhead lights. Mixed color temperatures from ceiling fixtures and daylight create orange or green casts that are difficult to correct in post.
- Position your camera 3–6 feet from the window at a 45-degree angle, not directly facing it, so the light rakes across the room and reveals texture.
- Set your camera to RAW and bracket two stops above and below your base exposure to preserve both window highlights and shadow detail.
If you already have photos from a recent shoot but the lighting is off, a crooked horizon is ruining the composition, or the color looks flat, a reshoot is not always the answer. HospitalityLens can correct lighting, color balance, and perspective on existing images, which often costs less and takes less time than scheduling a photographer again.
Key Takeaways
Reliable room photos come from one dominant light source, matched color temperature, a tripod, and bracketed exposures for windows.
Current HospitalityLens pricing (USD); one-time packs — The Hero: 1 photo for $12; The Refresh: 10 photos for $59; The Property: 25 photos for $129; The Portfolio: 100 photos for $399; monthly subscriptions — THE STARTER: 10 photos/month for $49/month; THE OPERATOR: 25 photos/month for $99/month; THE PORTFOLIO: 100 photos/month for $299/month; one-time pack credits do not expire; monthly subscription credits remain valid for up to 3 months; 2 free revisions per photo on one-time packs; 3 free revisions per photo on monthly subscriptions. See current pricing.
Table of Contents
Why lighting for room photos is a different problem than portraits
Photographing a room is not the same as photographing a person in a studio. In a studio, you control every source. In a room, you inherit the architecture.
Most rooms have at least three competing light sources: daylight through windows, overhead ceiling fixtures, and practical lamps on tables or shelves. Each source has a different color temperature. Daylight runs around 5,500–6,500K. Incandescent bulbs sit near 2,700K. Fluorescent overheads can land anywhere from 3,000K to 5,000K depending on the tube. Your camera’s sensor reads all of them simultaneously and averages them into a muddy compromise.
Reflective surfaces make this worse. Glossy floors, mirrors, and white walls bounce light unpredictably, creating hot spots in one corner and deep shadows in another. A single window that looks perfectly manageable to the eye can blow out to pure white in a photo while the far wall goes nearly black, because the dynamic range of a typical room scene often exceeds what a camera sensor can capture in a single exposure.
Real-estate professionals commonly turn off overhead artificial lights for daytime shoots precisely because mixed lighting produces unnatural color casts. The practical solution is to establish one dominant light source, usually the largest window, and treat everything else as either fill or a problem to eliminate.
How to use window light first and make it work consistently
Natural light is the most accurate starting point for room color. Many interior photographers begin by turning off room lights and working with window light alone because it yields the most truthful representation of the space.
Not all windows are equal, though. North-facing windows are the gold standard for indoor natural-light photography in the Northern Hemisphere because they never receive direct sun. The light they provide is consistent and soft throughout the day, with no harsh shadows and no color shift between morning and afternoon. East-facing windows give you warm, directional morning light that can be beautiful but changes quickly. West windows do the same in the afternoon. South-facing windows receive the most direct sunlight and are the most challenging to work with, often requiring heavy diffusion.
Window size and your distance from it both affect softness. A large window close to your subject acts like a giant softbox, wrapping light around surfaces and minimizing harsh shadows. Move further away and the effective size of the source shrinks relative to the subject, making shadows harder and contrast higher. For room portraits or lifestyle shots, staying within 3–6 feet of the window gives you the most flattering, controllable light.
When direct sun is hitting the window, diffuse it. A sheer curtain works well. So does a sheet of white frost film taped to the glass, or a translucent white sheet hung from a tension rod. For fill on the shadow side, a piece of white foam core propped against a chair costs almost nothing and bounces enough light to open up shadows without adding a second color temperature.
Dos and don’ts for window light:
- Turn off all artificial lights before metering. One mixed source ruins the white balance for the whole frame.
- Avoid shooting directly into a window without fill on the camera side. The room will go dark and the window will blow out.
- Use a reflector or foam core on the shadow side rather than adding a lamp, which introduces a competing color temperature.
- If the window light is too harsh, diffuse it at the source rather than trying to correct the contrast in post.
Pro Tip: Shoot parallel to the window rather than facing it. This gives you side-lighting that reveals texture in walls, floors, and furniture, and it keeps the window itself out of the frame so you avoid the blown-highlight problem entirely.
Which artificial lights work best for indoor room photography?
Window light is the starting point, but it disappears at night, varies with weather, and sometimes simply cannot reach the far end of a large room. That is when you choose between continuous LEDs, speedlights, or strobes.
Strobes give the power and repeatability to overpower bright windows and shoot at deep apertures, while continuous LEDs offer what-you-see-is-what-you-get convenience for shaping shadows in real time. Each has a distinct role.
| Light type |
Best for |
Power / brightness |
Color accuracy (CRI) |
Portability |
Price range |
Ease of setup |
| Continuous LED panel |
Night interiors, video, beginners |
Moderate |
High (>90 on quality units) |
High, battery options available |
$80+ |
Very easy, WYSIWYG |
| Speedlight / off-camera flash |
Small rooms, fill, travel |
Moderate–high |
Good (varies by unit) |
Excellent, runs on AA batteries |
$100–$250 |
Moderate, requires test shots |
| Strobe / monolight |
Commercial real estate, large rooms, deep DOF |
High–very high |
Excellent on quality units |
Low–moderate, requires power outlet |
$300+ |
Steeper learning curve |
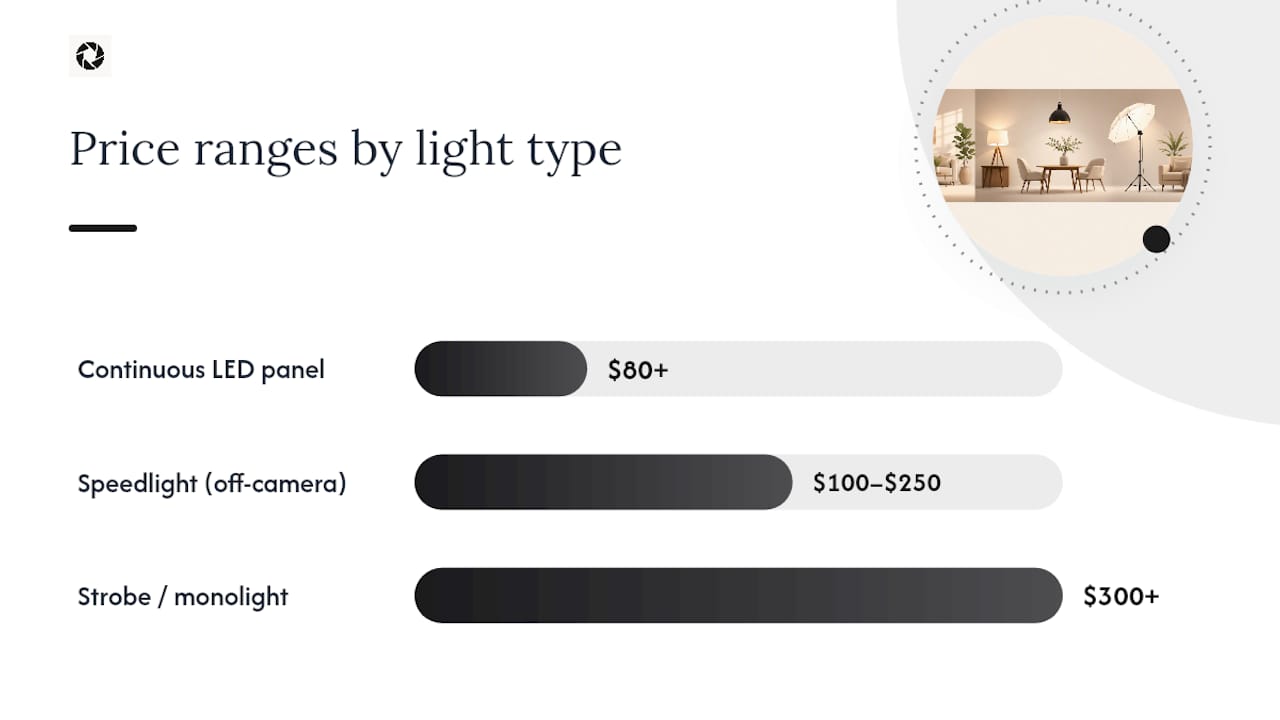
Continuous LED panels are the most accessible entry point. You see the effect before you press the shutter, which makes positioning straightforward. They work well for video walkthroughs as well as stills. The trade-off is power: most portable LED panels cannot overpower bright daylight, so they are most useful for night shoots or as supplemental fill in shaded areas.
Speedlights are compact and run on standard batteries, making them easy to carry between rooms. Off-camera, triggered wirelessly, they produce a short burst of daylight-balanced light that mixes cleanly with window light. Supplemental flash fills shadows and reduces reliance on high ISO settings, which keeps images cleaner and more consistent. The limitation is guide number: a single speedlight struggles to fill a large living room evenly.
Strobes are the professional choice when you need to stop down to f/8 or f/11 for wall-to-wall sharpness, or when you need to overpower a bright south-facing window. The power and color consistency are hard to match, but they require an outlet, stands, and more setup time.
How to shape light with modifiers so rooms look natural
Choosing the right light source is only half the work. How you shape that light determines whether the result looks natural or artificial.
The core principle is simple: a larger apparent light source produces softer, more gradual shadows. A bare speedlight is small and produces hard shadows. Put that same speedlight inside a 24-inch softbox and the shadows become soft and flattering. Move to a 48-inch softbox and the light wraps around furniture like a large window.
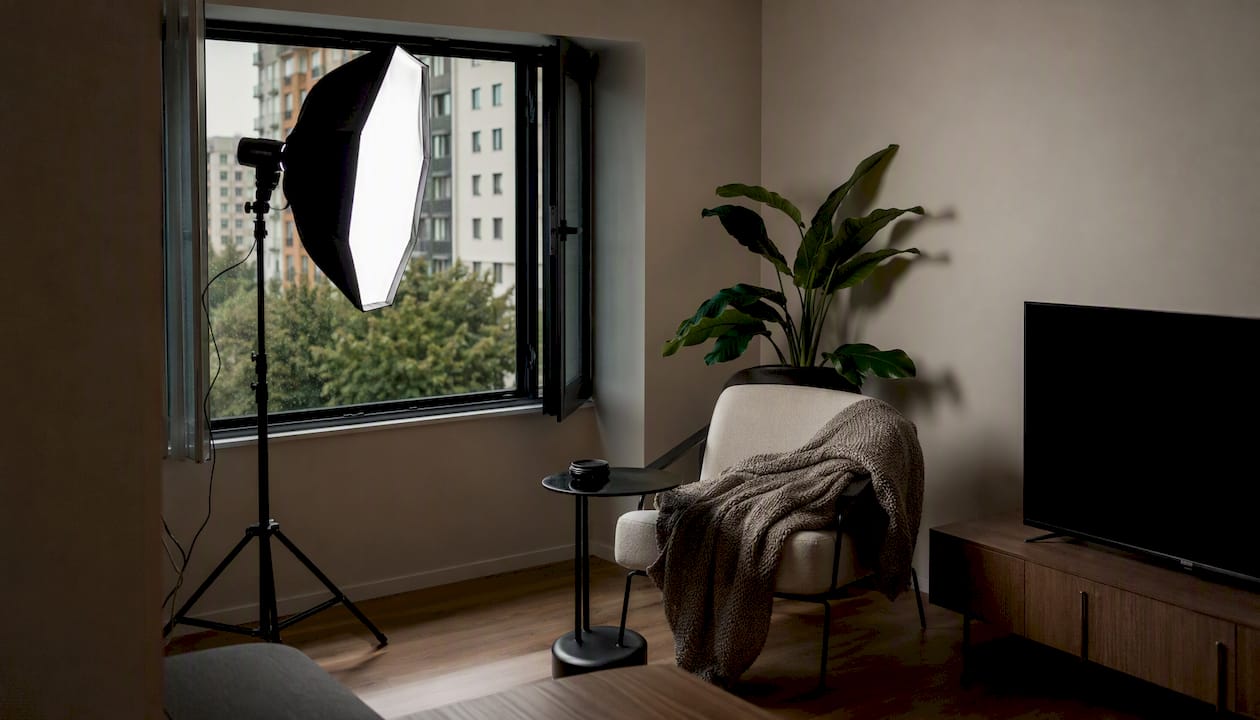
Bounce and diffusion techniques make artificial light look authentic by creating a soft, ambient quality similar to window light. Aiming a flash or LED at a white ceiling or wall turns the entire surface into a giant reflector, producing a soft, even fill that reads as natural ambient light in the final image. This works particularly well in rooms with white or light-colored walls.
Modifier choices and when to use them:
- Softbox: Best for controlled, directional soft light. Use as a key light positioned at 45 degrees to the subject. Larger is softer.
- Umbrella (shoot-through): Cheaper and faster to set up than a softbox. Produces a slightly less controlled spread, which can cause spill onto walls.
- Reflector (5-in-1): Portable and versatile. Use the white side for soft fill, the silver side for stronger fill, and the black side as a flag to block light from hitting a wall or lens.
- Flag or scrim: A dark panel placed to block light from spilling into areas where you want shadow. Preserves contrast and prevents flat, overlit results.
- Grid: Attaches to a softbox or beauty dish to narrow the beam angle. Useful when you want directional light without spill onto adjacent walls.
Pro Tip: Feather your softbox by aiming it slightly past the subject so the subject sits in the edge of the beam rather than the center. This avoids the bright hotspot that appears when the center of a softbox points directly at a surface, and it produces a more gradual, natural-looking falloff.
Camera settings and a repeatable on-site workflow
Good lighting setup is wasted if the camera settings undermine it. The workflow below is repeatable, which matters when you are shooting multiple rooms in a single property or managing a portfolio of listings.
Start with the tripod. Locking your framing before you touch exposure settings means you can bracket multiple shots and blend them later without misalignment. This is the single most important piece of gear for room photography.
Aperture controls depth of field. For real-estate shots where you want the entire room sharp from foreground furniture to the far wall, f/8 is a reliable starting point. For lifestyle or portrait shots within a room, f/2.8–f/4 separates the subject from the background. Strobes let you shoot at f/8–f/11 even in dim rooms because they add the exposure you need.
ISO should stay as low as the scene allows. ISO 100–400 keeps noise minimal. When using flash or strobe, you can often shoot at ISO 100 regardless of ambient light level. With continuous LEDs in a dim room, you may need to push to ISO 800–1600, which is acceptable on modern cameras but worth monitoring.
Shutter speed has one hard rule when using flash: stay at or below your camera’s sync speed, typically 1/200s or 1/250s. For natural-light or LED-only shots, use whatever shutter speed gives correct exposure, since the camera is on a tripod and motion blur is not a concern.
White balance: set a Kelvin value manually rather than using Auto WB. Auto WB shifts between frames, which makes blending and consistency across a portfolio difficult. For daylight-only shots, 5,500K is a reliable starting point. For mixed or artificial light, match the Kelvin to your dominant source. Shoot RAW so you can fine-tune white balance in post without quality loss.
Workflow checklist:
- Lock framing on tripod
- Set base exposure (aperture first, then ISO, then shutter)
- Bracket: shoot at base, +2 stops, and -2 stops for window blending
- Add fill or flash and confirm color temperature match
- Set Kelvin white balance manually
- Take a gray-card reference frame for post-processing
- Check for unwanted reflections in mirrors or glossy surfaces before finalizing
Starter kit setups from beginner to pro
You do not need a full studio to get good room photos. The right kit depends on your budget, how often you shoot, and how much gear you can carry between properties.
Beginner kit ($100–$250):
- Tripod (any stable model with a ball head)
- Two sheets of white foam core as reflectors
- One daylight LED panel (Lume Cube panels are compact, battery-powered, and daylight-balanced at 5,600K, making them a practical choice for small rooms and travel)
- Total weight: under 5 lbs, fits in a carry-on
Intermediate kit ($400–$900):
- Manfrotto tripod and two light stands (Manfrotto stands are widely used for their stability and compatibility with a range of modifiers)
- Two tunable-white LED panels with CRI >90
- One medium softbox (24–36 inches)
- Wireless flash triggers such as PocketWizard transceivers, which give reliable sync across rooms and through walls without line-of-sight constraints
- Lastolite 5-in-1 reflector/diffuser kit for fill and diffusion control
- Total weight: 15–20 lbs, fits in a rolling carry-on
Pro kit ($1,500+):
- Two or three strobes or monolights with modeling lights
- Large softboxes (48 inches or larger) and gridded accent lights
- Multiple Manfrotto stands and a light meter
- PocketWizard triggers for multi-strobe sync
- Lastolite collapsible scrims for window diffusion
- Total weight: 40+ lbs, requires a vehicle
A single soft key light paired with a reflector produces flattering, natural-looking indoor portraits and is often sufficient for relaxed home or hospitality shots. The beginner kit above delivers exactly that setup. For property managers who shoot occasionally, starting there and adding a softbox and wireless triggers as skills grow is a practical path.
For listing teams managing multiple properties, standardizing bulbs across a portfolio, packing two per-room lighting presets, and training capture staff on a one-page cheat sheet keeps results consistent without requiring a professional photographer at every property.
How to control color and handle mixed lighting on location
Color is where most room photos fall apart, and it is usually invisible until you see the image on a calibrated screen. A room that looks neutral to the eye can photograph with a strong orange cast from a table lamp, a green tint from a fluorescent overhead, or a blue shift from a north-facing window on an overcast day.
The standard fix is to eliminate competing sources before you shoot. Turn off overhead fluorescents and incandescent lamps. Let the window be the dominant source. Affordable high-CRI tunable-white and RGBIC smart lamps now let listing teams create repeatable presets; choose bulbs with CRI >90 and keep mixed sources within approximately 800K of each other when mixing is unavoidable.
When you cannot turn off a practical lamp because it is part of the room’s atmosphere, match it to your dominant source with a gel. An orange CTO gel over a daylight flash warms it to match incandescent lamps. A blue CTB gel over a warm LED cools it toward daylight. You do not need a perfect match, just close enough that the camera’s white balance can handle the remaining difference.
CRI matters more than most photographers realize. A bulb with CRI 80 renders colors acceptably but shifts certain hues, particularly reds and greens, in ways that look slightly wrong in photos. A bulb with CRI >90 renders colors accurately enough that what you see is what the camera captures. For listing photos, where accurate color builds guest trust, CRI >90 is worth the small price premium.
Smart-lamp app presets and matching CRI and color temperature across a property create repeatable looks that scale across portfolios. Set the preset once, save it, and every room in the property photographs under the same conditions. For teams managing consistent visuals across multiple listings, this kind of standardization reduces editing time significantly.
A gray card is the most reliable on-site calibration tool. Photograph it under your shooting conditions, then use the eyedropper in Lightroom or Capture One to set a neutral white balance from that frame. Apply the same correction to every image from that room.
How to handle windows and high dynamic range
The window problem is the most common technical challenge in room photography. The interior is dim. The window is bright. The camera cannot capture both in a single exposure without sacrificing one or the other.
Bracketing solves this. With your camera on a tripod and framing locked, shoot three to five frames at different exposures: your base exposure for the interior, two stops overexposed to capture shadow detail, and two stops underexposed to preserve window highlights. The frames align perfectly because the tripod holds position.
Bracketing and blending exposures are often more practical than large strobes in small spaces and cost nothing beyond the time to shoot and blend. For most listing photos, this approach delivers cleaner results than trying to light the entire room with a single flash setup.
Blending options:
- Photomatix Pro: Purpose-built for HDR and exposure blending. Produces natural-looking results when you use the exposure fusion mode rather than the tone-mapped HDR mode, which tends toward the oversaturated look that makes listing photos look artificial.
- Lightroom HDR Merge: Simple and non-destructive. Works well for moderate dynamic range scenes. Less control than Photomatix for complex windows.
- Photoshop layer masks: The most precise method. Stack your exposures as layers, mask in the correctly exposed window from the underexposed frame, and blend the interior from the brighter frame. Takes more time but gives full control.
For very large rooms or complex lighting situations, light painting is an alternative. Shoot in a darkened room with a long exposure, walking through the frame with a portable LED panel to paint light onto specific surfaces. Multiple passes are blended in post. The result can look remarkably natural, though the technique requires practice.
Avoid the oversaturated HDR look. It reads as artificial to guests and undermines the trust that listing photos are supposed to build. When in doubt, underprocess.
Your pre-shoot checklist for on-site room photos
Running through this list before you press the shutter prevents the most common image-killers and reduces the need for re-shoots.
- Turn off all overhead lights and fluorescent fixtures
- Remove clutter: clear countertops, tuck away cables, straighten cushions
- Set camera to RAW
- Mount on tripod and lock framing
- Photograph a gray card under shooting conditions for white balance reference
- Set Kelvin white balance manually to match dominant source
- Take base exposure, then bracket +2 and -2 stops
- Add fill or flash if needed and confirm color temperature match
- Check for reflections in mirrors, TV screens, and glossy floors
- Move small reflective objects (picture frames, shiny decorations) out of the frame or reposition them
- Dim or reposition practical lamps if they create hot spots
- Reposition lamp shades to direct light away from the camera lens
The camera, key light, and reflector relationship in a corner composition works like this: position the camera in the corner of the room facing diagonally across the space. Place your key light (window or LED panel) to one side of the camera at 45 degrees. Place a reflector on the opposite side to fill shadows. This setup captures the most depth and gives the room a sense of dimension that straight-on shots cannot match.
When should you reshoot, and when is post-processing enough?
Not every lighting problem requires a new shoot. Knowing the difference saves time and money.
Reshoot when:
- The framing is wrong and cannot be corrected (wrong angle, missing key features of the room)
- Major structural clutter or damage is visible and cannot be removed in post
- The original photos are severely underexposed with no recoverable shadow detail
- The room has been significantly changed since the last shoot
Post-processing or AI enhancement is usually sufficient when:
- Exposure is off by one or two stops but detail is present in highlights and shadows
- Color cast is mild to moderate (orange from lamps, blue from overcast daylight)
- The horizon is slightly crooked
- Minor clutter or a person needs to be removed
- The image needs perspective correction
AI enhancement services like HospitalityLens handle lighting correction, color balance, perspective correction, and clutter cleanup on existing images. What they do not do is invent rooms, fabricate views, or add amenities that are not present. The capabilities and limits of AI-based lighting correction are worth understanding before you decide whether to submit a photo or schedule a new shoot.
Professional photographers remain the right choice for flagship property launches, architectural photography requiring specific angles, or situations where the original photos are simply unusable as a starting point.
How to position lights to avoid shadows and glare
Shadow and glare problems are almost always positioning problems, not equipment problems.
Hard shadows appear when the light source is small relative to the subject and positioned at a steep angle. The fix is to move the light closer (which increases its apparent size) or switch to a larger modifier. A shadow that falls across a wall behind a piece of furniture usually means the light is too far to the side. Moving it closer to the camera axis softens the shadow and pushes it behind the subject where it is less visible.
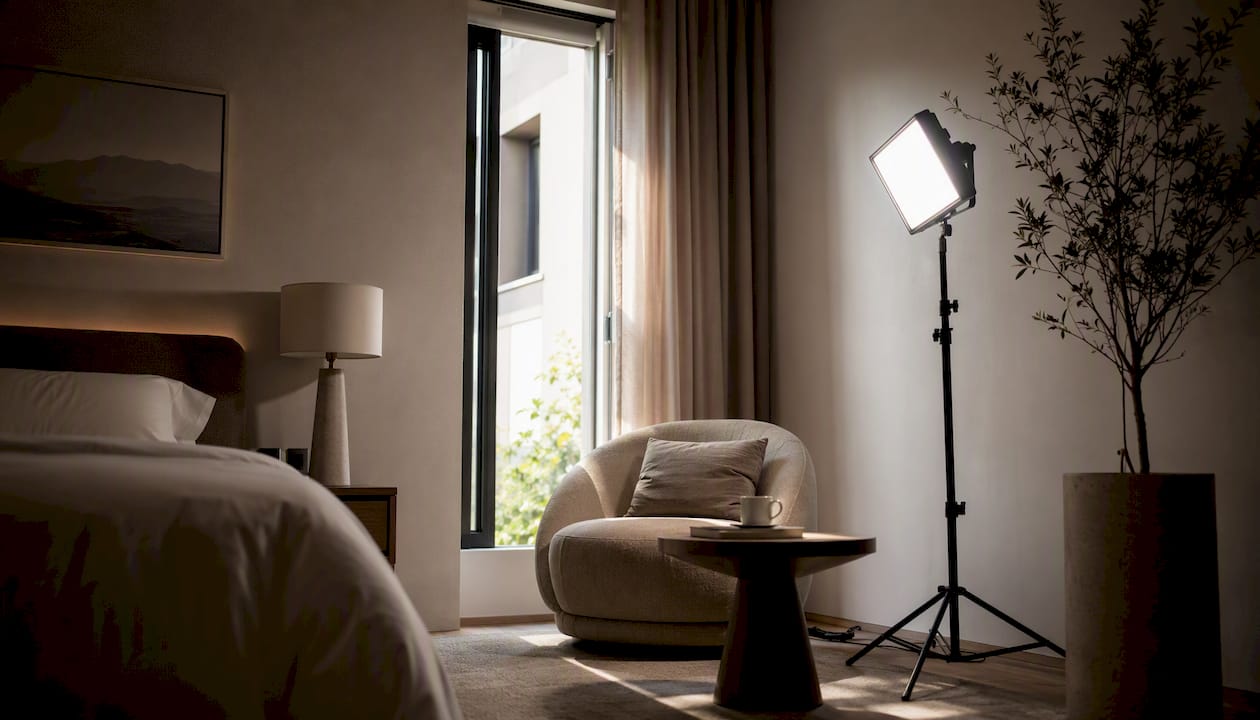
Glare on glossy surfaces, floors, and TV screens comes from the angle of incidence equaling the angle of reflection. If your light is hitting a glossy floor at 45 degrees, the reflection bounces at 45 degrees in the opposite direction. Move the light higher or lower to change the reflection angle so it exits the frame rather than entering the lens. A polarizing filter on the lens can reduce glare further, though it cuts about two stops of light.
For ceiling-mounted fixtures or pendant lights that create hot spots in the frame, dim them or turn them off entirely. If they need to stay on for atmosphere, position your camera so the fixture is outside the frame, or use a flag to block the direct light from reaching the lens.
Multiple lights create multiple shadows. When using two or more sources, check that the shadows from each light do not cross each other at conflicting angles, which reads as unnatural. The solution is to make one source clearly dominant and use the second only as a gentle fill at lower power.
Power and battery management for artificial lights on location
Running out of power mid-shoot is avoidable with a small amount of preparation.
Battery-powered LED panels like the Lume Cube are convenient but have finite run times. Carry at least one spare battery per panel for shoots longer than 90 minutes.
Speedlights running on AA batteries recycle faster with lithium batteries than alkaline. For a full-property shoot, carry two sets of fresh lithium AAs per flash unit. A battery grip or external battery pack, such as those compatible with Canon or Nikon speedlights, extends recycle time and shot count significantly.
Strobes and monolights require an AC outlet. Before arriving on location, confirm outlet availability in each room you plan to shoot. Extension cords rated for the strobe’s wattage are worth carrying. A power strip with surge protection protects equipment and gives you multiple outlets from a single wall socket.
For teams shooting multiple properties in a single day, a small portable power station (a lithium battery pack with AC outlets) can run a monolight or two LED panels without needing a wall outlet. These units are widely available and practical for locations where outlet access is limited, such as outdoor patios or older properties with few wall sockets.
Wireless triggers like PocketWizard transceivers run on AA batteries. Replace them at the start of every shoot day rather than waiting for a misfire to signal low power.
The lighting trade-offs that actually matter on real shoots
Most lighting guides treat gear as the primary variable. In practice, the room preparation and the decision about which single source to prioritize matter more than the specific equipment.
The photographers and property teams who get consistent results are not necessarily using the most expensive gear. They are the ones who arrive with a checklist, turn off competing light sources before they meter, and commit to one dominant light rather than trying to balance three simultaneously. A Lume Cube on a small stand, aimed at a white wall, in a room with all the overhead lights off, will outperform a poorly positioned strobe in a room full of competing sources.
The other variable that separates consistent results from inconsistent ones is repetition. The first time you run a bracketing workflow in a new room, it takes 20 minutes. The tenth time, it takes five. Checklists are not bureaucracy; they are the mechanism that turns a skill into a habit.
As budgets and skills grow, the upgrade path is clear: add a softbox before adding a second light, add wireless triggers before adding a strobe, and add a light meter before adding a third source. Each addition solves a specific problem. Adding gear before you have identified the problem it solves usually creates more complexity without improving results.
Already have photos? HospitalityLens fixes lighting without a reshoot
Shooting with good lighting technique gets you most of the way there. But property teams often inherit photos taken by owners, cleaners, or previous managers, and those images rarely meet listing standards.

HospitalityLens corrects lighting and color balance, straightens crooked horizons, removes clutter and people, and improves overall visual polish on existing images, including dark smartphone photos and owner-submitted shots. It works on the real property as captured, without inventing features, views, or amenities that are not there. For portfolio refreshes, seasonal updates, and quick fixes on underperforming listings, it delivers results faster and at lower cost than scheduling a new shoot.
The practical use cases where AI enhancement makes more sense than a reshoot: a listing with 20 photos where three rooms photograph poorly, a new property onboarding where the owner’s phone photos are usable but underexposed, or a seasonal refresh where the furniture has changed but the room structure is the same.
Free watermarked preview. Pay only if you like it. No card is required to create the free watermarked preview. See current pricing for unlocks, one-time packs, and subscriptions.
Sources
Resources referenced in this guide, organized by workflow:
FAQ
How do you get good lighting in a room for pictures?
Turn off all overhead lights, position yourself 3–6 feet from the largest window at a 45-degree angle, and use a white reflector or foam core on the shadow side for fill. Set your camera to RAW, lock framing on a tripod, and bracket exposures to handle the window’s brightness.
What type of indoor lighting is best for taking photos?
Diffused natural light from a north-facing window is the most reliable source for accurate color and soft shadows. When natural light is insufficient, a daylight-balanced LED panel with CRI >90 is the most practical artificial alternative for room photography.
What is the 2/3 rule for pictures?
The rule of thirds divides the frame into a 3x3 grid and places the main subject at one of the four intersection points rather than the center. In room photography, this typically means positioning a key piece of furniture or the window at one of those intersections to create a more balanced, visually engaging composition.
How do you set up lights for indoor photos?
Place one key light (a softbox, LED panel, or window) at 45 degrees to the subject, position a reflector on the opposite side to fill shadows, and turn off all other light sources to avoid competing color temperatures. Set your Kelvin white balance to match the dominant source, shoot RAW, and bracket for any windows in the frame.
Recommended