Photography Tips
Sharpen Interior Photos for Property Managers: One Free Preview, No Reshoot
Transform your interior property photos into stunning, booking-ready images with AI enhancement, saving time and avoiding costly reshoots.
By Hospitality Lens · · 12 min read
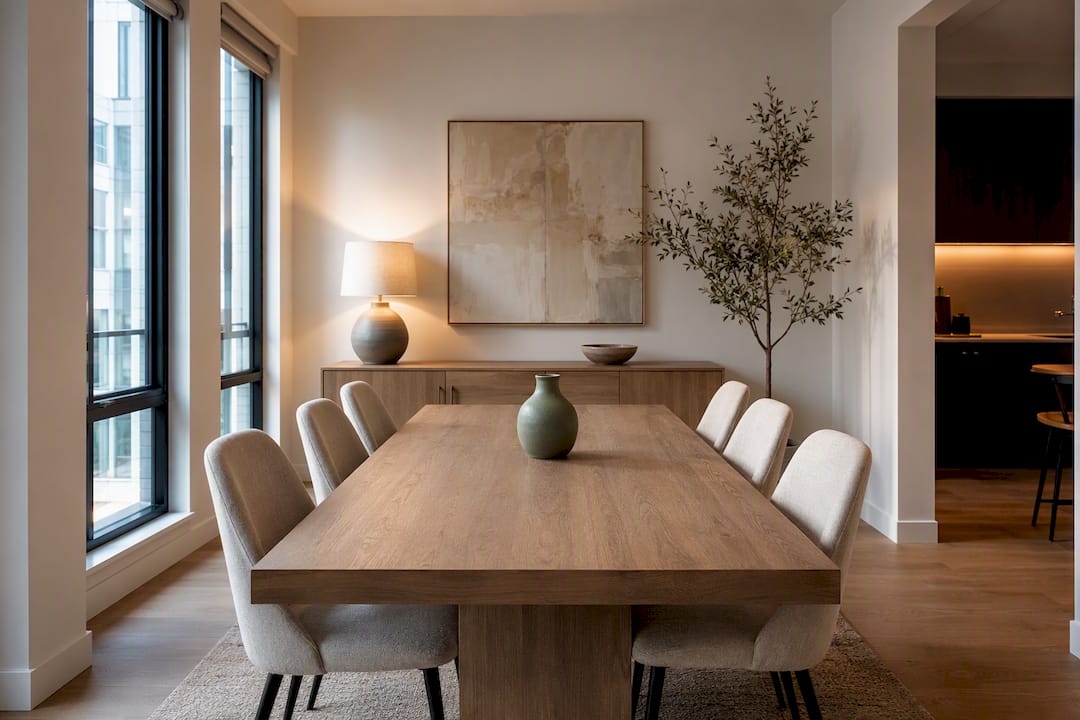
AI enhancement can sharpen interior photos into booking-ready images when your base photos already capture the room clearly, even if they’re dark, crooked, or shot on a phone. The core edits are white balance, exposure, perspective correction, and clutter removal. If your original shots are blurry, poorly framed, or missing key angles entirely, no amount of editing fixes that. You need new photos, not sharper ones.
TL;DR:
- AI enhancement can improve lighting, color balance, and perspective corrections but cannot fix blurry, poorly framed, or low-resolution photos.
- Proper preparation includes capturing high-quality JPEG images in landscape orientation, shooting during optimal daylight, and tidying the space before photographing.
- Image quality can influence how people evaluate a listing, but there is no universal performance uplift that applies to every property. Measure clicks, inquiries, bookings, or sales on the individual listing.
- Key edits include white balance correction, exposure balancing, perspective straightening, and clutter removal, avoiding the addition of non-existent furniture or features.
- Booking site image requirements favor files around 1,920 by 1,280 pixels in JPEG format, with 20 to 30 refined images for best performance.
HospitalityLens
Refresh Your Listing Photos Without Reshooting
Turn usable phone or existing listing photos into realistic, booking-ready images with truthful enhancement and no new photoshoot.
Try one photo freeTable of Contents
What Does It Mean to Sharpen Interior Photos?
“Sharpening” in a listing context isn’t the same as the edge-clarity slider in a photo app. For property managers, a sharper interior photo means one that looks clean, well-lit, properly aligned, and free of distractions. Guests aren’t judging pixel-level crispness. They’re judging whether the room looks trustworthy and appealing enough to book.
That distinction matters because it changes what you’re solving for. A photo can be technically in focus and still read as amateurish if the walls lean, the windows are blown out white, or a trash can sits in the corner of the frame. Real sharpening for interiors means correcting those problems, not just running a sharpen filter over a soft image.
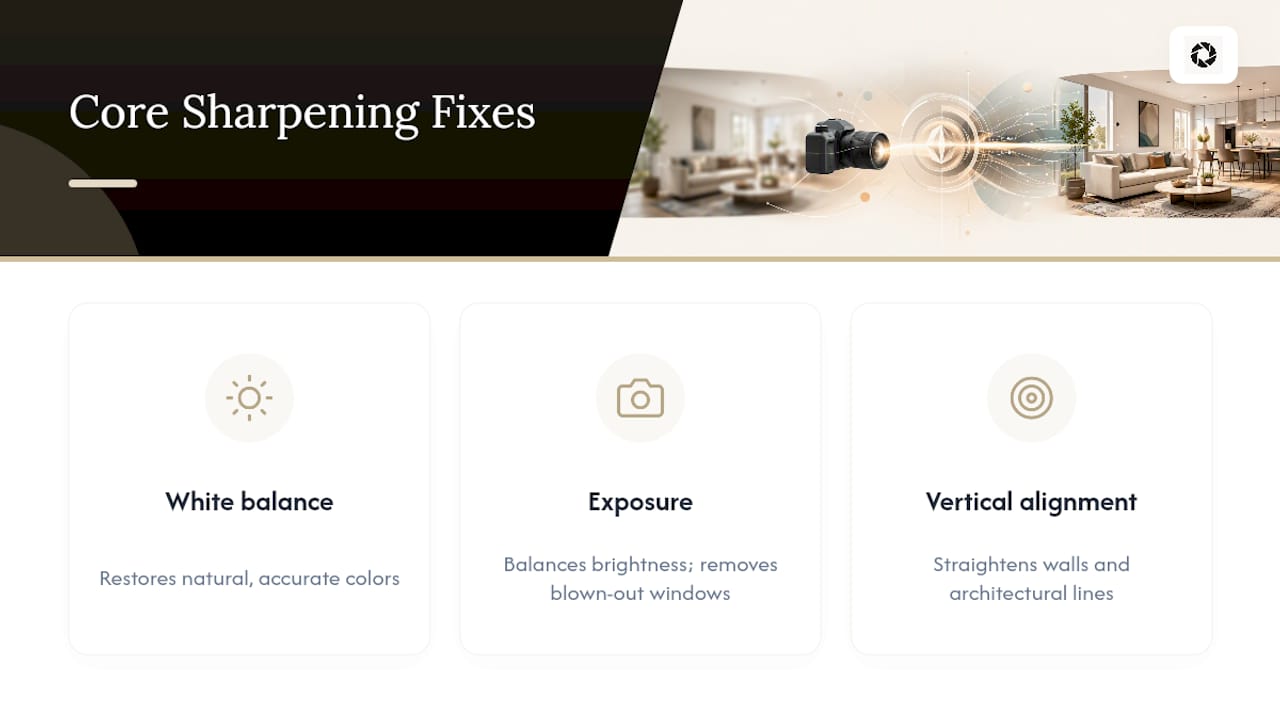
The three fixes that separate a forgettable photo from a booking-ready one are white balance, exposure, and vertical alignment, according to industry guidance on short-term rental photography. Get those three right and most interiors already look dramatically better before anyone touches a clutter tool.
What Should You Check Before Uploading Photos?
A few minutes of prep before you upload saves you revision rounds later. Run through this before you submit anything for enhancement.
- Confirm the file is a JPEG in landscape orientation, ideally close to a 3:2 ratio.
- Shoot more than you need. Aim to capture 40 to 60 images per property so you can publish the strongest 20 to 30.
- Shoot mid-morning or mid-afternoon, or wait for overcast skies. Direct sun through a window creates blown-out glare that’s hard to correct after the fact.
- Do a five-minute tidy pass: hide cords, put away personal items, make the bed, straighten towels.
- Stand square to the room and hold the phone level. A cheap tripod or a bubble-level app helps more than people expect.
- Label each photo by property and room before uploading so batches move faster.
Pro Tip: A clip-on wide-angle phone lens costs $30 to $80 and captures more of the room in one frame, which means less aggressive perspective correction later and a more natural-looking result.
What’s the Best Workflow for Editing a Full Property Gallery?
Editing one photo is simple. Editing 25 photos across five rooms without losing consistency takes a process. Here’s the sequence that keeps a full property gallery efficient and coherent.
- Organize and pick your heroes first. Sort raw files by room, then flag the one or two images per space most likely to become your cover and secondary lead shots. Everything else gets edited in support of those.
- Decide the edit scope per image. A well-lit bedroom might only need color correction. A dim kitchen shot from a low angle might need full perspective correction, window exposure balancing, and object removal. Don’t apply the same heavy treatment to every photo.
- Submit in batches and review the previews. Check each result against the real room. Does the lighting still look plausible for that space? Are the proportions accurate? A preview that looks too polished to be real is a red flag, not a win.
- Request revisions where needed. Most enhancement services, including HospitalityLens, allow one to two rounds of revisions per photo. Use them if a countertop looks smeared or a doorframe still leans.
- Download at the right size and upload in order. Lead with your cover photo, then move logically: living area, kitchen, primary bedroom, bathroom, secondary rooms, outdoor space, then detail shots like amenities or a coffee station.
That sequencing isn’t arbitrary. Guests scan galleries in order, and platforms like Airbnb and Booking.com display the first several images most prominently in search. Front-loading your strongest, most representative rooms gets more mileage out of every enhanced photo you paid for.
Which Edits Actually Sharpen an Interior Photo?
Four specific corrections do the real work here, and understanding them helps you evaluate whether an enhancement service is doing a good job or just applying a generic filter.
- White balance correction removes the yellow or blue color cast that comes from mixed indoor lighting, so walls read as their true color instead of jaundiced or cold.
- Exposure and window handling brightens dark corners of a room while keeping window views from blowing out to solid white, which is one of the three corrections every interior photo set needs.
- Perspective and vertical correction straightens leaning walls and door frames, a common problem with phone photos shot at a slight upward or downward angle.
- Careful sharpening after noise reduction avoids the halo effect around edges that happens when sharpening is applied too aggressively or before noise is cleaned up.
Object removal has a firm boundary. A clean edit removes transient clutter: cords, trash, a stray pair of shoes, someone’s laptop on the counter. It does not remove permanent fixtures, add furniture that isn’t there, or alter the layout. AI editing tools commonly handle exposure correction, white balance, HDR blending, perspective correction, and object removal in batch, and that combination is what makes a full gallery look consistent instead of like ten separately edited photos stitched together.
Pro Tip: Ask for a subtle, consistent color grade across the whole gallery rather than a bold filter on a few standout shots. A uniform visual language across every photo reads as more professional than one or two dramatically edited images next to plain ones. For more on getting natural-looking brightness without overcorrecting, see this guide on brightening interior listing photos.
What Photo Specs Do Booking Sites Actually Need?
Most booking platforms compress images on upload, which means a file that looks sharp on your phone can turn soft and blocky once it’s live. Uploading at a higher resolution than the platform’s minimum gives the compression algorithm more to work with.
- Upload at roughly 1,920 by 1,280 pixels in a 3:2 landscape ratio, which survives platform compression better than smaller files.
- Stick to JPEG or PNG, and check your platform’s file-size cap before batch uploading.
- Publish 20 to 30 photos per listing, with the cover photo carrying the most weight for click-through.
- Before publishing, check for leaning verticals, blown-out windows, visible compression artifacts, and any inaccurate representation of a room or amenity.
Image quality connects directly to performance. Research has examined how imagery affects property and hospitality decisions, but any specific quantitative conclusion should be tied directly to a primary source and its study context. A simple way to test that on your own listing: swap only your cover photo and track click-through over two weeks before changing anything else. For a fuller rundown of upload settings by platform, see this guide on preparing photos for booking sites.
When Should You Hire a Photographer Instead of Using AI?
AI enhancement earns its keep when your base photos already have the right content and you need speed and volume: onboarding a new property, refreshing a stale listing, updating for a new season, or bringing a whole portfolio to a consistent standard. It’s a batch tool, and batch is where it shines.
A professional photographer is the better call in a few specific situations.
- The listing needs marketing hero shots that require a new angle no existing photo captures.
- Lighting conditions are genuinely difficult (mixed sources, no natural light, awkward room shapes) and need on-site correction, not post-processing.
- The property is a flagship unit where architectural fidelity and premium positioning justify the higher cost.
- The existing photos are unusable: badly framed, missing rooms entirely, or too low-resolution to salvage.
On cost and speed, AI enhancement runs per photo or through a pack, while a professional shoot is typically priced per property and takes days to schedule and deliver. Real estate teams have reported measurable gains in inquiries from AI-enhanced photos at a fraction of the manual editing cost, though pro photography still leads for complex or flagship work. One line stays fixed regardless of which route you choose: never use enhancement to invent a room, a view, or a structural feature that doesn’t exist. That’s not sharpening. That’s misrepresentation, and it costs you guest trust the moment they walk through the door.
Why Truthful Enhancement Matters More Than Perfect Photos
We built HospitalityLens around one operating rule: enhance what’s real, never invent what isn’t. A brighter kitchen and a straighter wall build guest trust. A room that doesn’t match its photos destroys it, along with your reviews.
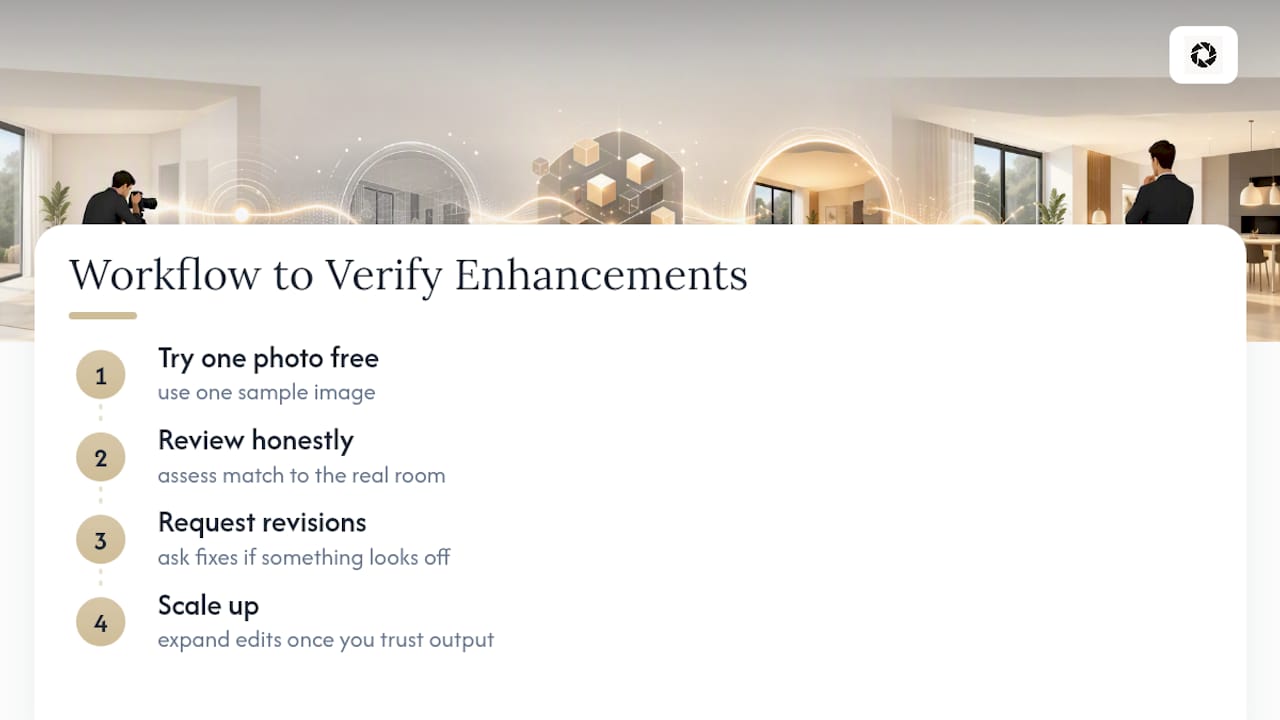
Most property teams don’t need a full reshoot. They need their existing photos to look as good as the room actually does. The workflow that works best in practice: try one photo free, review the result honestly, request revisions if something looks off, then scale up once you trust the output.
Pro Tip: If you can only prioritize two things, prioritize your cover photo and gallery-wide color consistency. Those two levers move click-through more than any other single edit.
— The HospitalityLens Team
Try HospitalityLens Before You Book a Reshoot
Free watermarked preview. Pay only if you like it. No card is required to create the free watermarked preview. See current pricing for unlocks, one-time packs, and subscriptions.

For a full property, one-time packs start at a set price for 10 photos, with per-photo costs decreasing at higher volumes, each with revision rounds. Teams refreshing listings regularly can opt for a monthly subscription for recurring photo enhancements. A practical way to test the fit: run three photos first, your cover shot, a living area, and a bedroom, then compare against your current gallery before committing to a full 20-photo refresh. If you manage multiple properties, see how HospitalityLens compares to booking a photographer for portfolio-scale work, or check the step-by-step guide before your first upload.
Sources
- Staystra
- Image quality can influence how people evaluate a listing, but there is no universal performance uplift that applies to every property. Measure clicks, inquiries, bookings, or sales on the individual listing.
FAQ
Can AI Actually Sharpen a Blurry Interior Photo?
AI enhancement can improve exposure, color, and perspective, but it can’t fix a photo that’s genuinely out of focus or shot at too low a resolution. If the original file lacks detail, no editing tool recovers it. You need a reshoot, not enhancement.
How Many Photos Should I Upload Per Listing?
Industry guidance recommends shooting 40 to 60 photos per property and publishing the strongest 20 to 30. More usable, high-quality images in that range generally performs better than a shorter, sparse gallery.
What Does HospitalityLens Cost Per Photo?
Free watermarked preview. Pay only if you like it. No card is required to create the free watermarked preview. See current pricing for unlocks, one-time packs, and subscriptions.
Will AI Enhancement Add Furniture or Change a Room’s Layout?
No. Truthful enhancement corrects lighting, color, perspective, and removes transient clutter like cords or trash, but it never adds furniture, invents features, or alters a room’s actual layout. Any service that does this is misrepresenting the property.
How Long Does It Take to Get Enhanced Photos Back?
Most AI enhancement services deliver a preview within minutes, since batch processing is one of the format’s core advantages over a manual editing pass. A full photographer-shot gallery, by comparison, typically takes days from shoot to final delivery.
Recommended