Photography Tips
Sky Replacement in Real Estate Photos: What It Is and When to Use It
Transform drab property photos with vibrant sky replacements, attracting more buyers and making your real estate listings irresistibly appealing.
By Hospitality Lens · · 17 min read
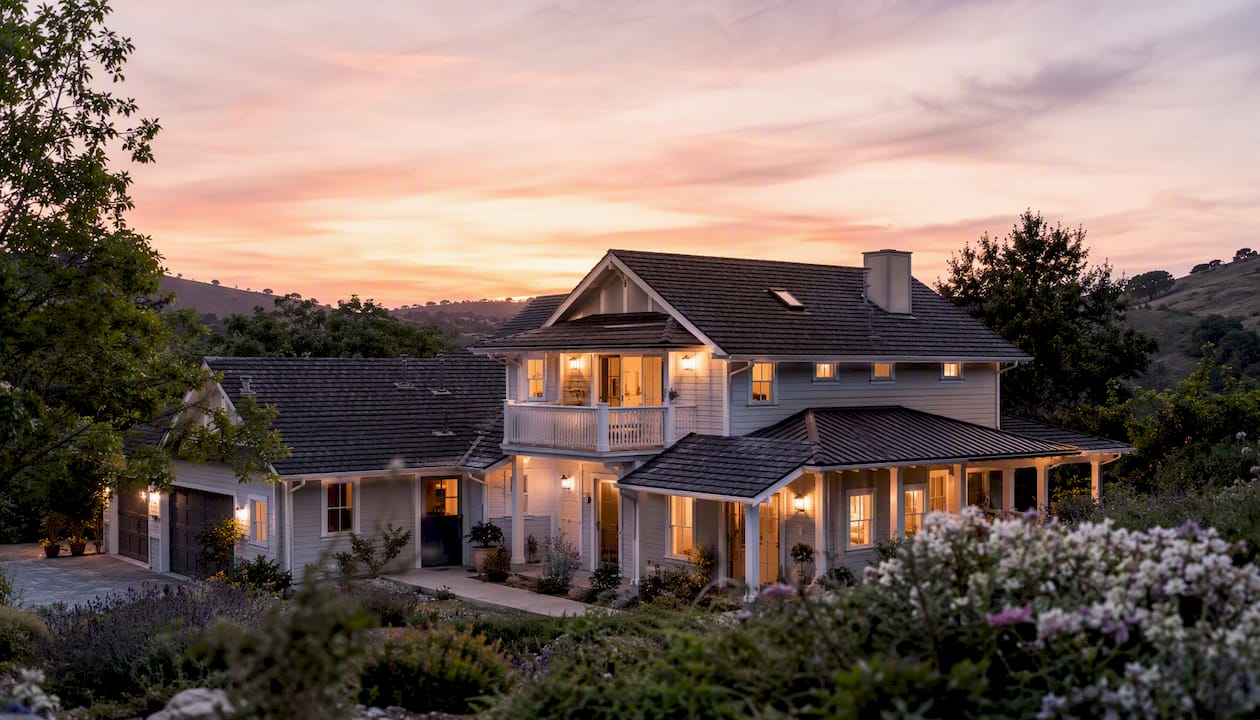
Sky replacement swaps a dull, gray, or blown-out sky in a property photo with a clearer or more appealing one, without touching the building itself. Real estate photographers and agents use it to make listing photos more inviting when the weather didn’t cooperate, without waiting on a reshoot or misrepresenting the property.
Here’s the quick verdict on when it belongs in your workflow:
- Use it when: the sky is flat, overcast, or blown out but the property itself looks accurate and well lit.
- Avoid it when: the lighting on the building doesn’t match any plausible sky, or you’re tempted to hide a structural issue behind a prettier backdrop.
- The one-line rule: if the property’s shadows and light direction can’t be made to agree with the new sky, reshoot instead of forcing an edit.
Tools like Photoshop’s Sky Replacement feature handle this at the software level, National Association of REALTORS guidance leans toward truthful presentation over dramatic enhancement, and services like HospitalityLens apply the same principle to batches of listing photos without a new photoshoot.
Key Takeaways
Sky replacement swaps only the sky in a listing photo, and matching light direction and disclosing the edit are what keep it honest and effective.
Free watermarked preview. Pay only if you like it. No card is required to create the free watermarked preview. See current pricing for unlocks, one-time packs, and subscriptions.
Table of Contents
What Is Sky Replacement in Real Estate Photos?
Sky replacement isolates the sky region of a photo and swaps it for a different sky image, leaving every other pixel of the property untouched. The roofline stays exactly where it was. The window reflections stay the same shape. Only the strip of gray or white above the horizon changes.
This matters because it draws a hard ethical line most agents intuitively understand but rarely articulate: you’re changing the weather, not the property. A three-stage AI workflow detects the sky, masks it precisely around tricky edges like rooflines and tree branches, then harmonizes the lighting so the swap doesn’t look pasted in.
A few scenarios show up constantly in listing work. An overcast midday shoot leaves the sky a featureless white sheet with no texture. A bright noon sun blows out the sky to pure white while the house sits in flat, harsh light. A twilight shot needs a deeper blue or warmer glow to hit that premium “dusk exterior” look agents love for hero images.
In every case, the goal is presentation, not fabrication. You’re not adding a pool, a view, or a second story. If a viewer would reasonably wonder whether a real feature has changed, that’s the line where disclosure practice comes in, which we’ll cover in detail further down.
How Does Sky Replacement Actually Work?
Every sky replacement, whether done by hand or by an algorithm, follows roughly the same sequence:
- Select the sky region. Software detects where the sky ends and the property begins, usually using edge detection tuned to catch complicated boundaries like tree lines and chimneys.
- Refine the mask. Fine details, especially branches, antennas, and power lines, get cleaned up so no ghosting or fringing survives the swap.
- Drop in the new sky. The replacement sky image gets placed behind the masked property, matched roughly for scale and horizon position.
- Harmonize the light. The foreground gets a color and tone adjustment so it reads as if it were shot under the new sky’s lighting, not the old one.
- Final grade. A last pass balances shadows, highlights, and color temperature across the whole frame.
Manual masking in Photoshop gives you full control over every one of those steps, which is valuable when a mask needs surgical precision around a complicated roofline or a chain-link fence. Lightroom’s sky tools work faster for straightforward swaps but offer less granular control over local adjustments. AI tools like Skylum Luminar Neo’s Sky AI feature automate the entire sequence: detection, masking, and harmonization happen in one pass, which is dramatically faster for anyone editing more than a handful of images a week.
The tradeoff is control versus speed. Manual work in Photoshop wins when a single hero shot needs to be flawless. Automated tools win when you’re processing a full listing gallery or a portfolio of properties on a deadline.

When Should You Replace the Sky Instead of Reshooting?
Three situations make replacement the more sensible call over waiting for better weather. Weather risk is the obvious one: if a listing needs to go live this week and the forecast shows five straight days of overcast skies, waiting isn’t realistic. Schedule constraints matter just as much. Photographers juggling multiple bookings a day can’t always return for a golden-hour reshoot every time a sky looks lifeless. Batch editing across a gallery or a whole property portfolio is the third: correcting ten flat skies in a single automated pass is far more practical than re-shooting ten exteriors.
The benefits show up directly in listing performance. A vivid, blue-sky exterior shot tends to draw more clicks than a gray, flat one, since the exterior photo is usually the first image a browser sees. Consistency across a portfolio also matters more than most agents assume. If a management company runs twenty properties and eight were shot under different weather conditions, matching skies across the set makes the whole portfolio feel like one coherent brand rather than a patchwork. Turnaround speed and cost savings round out the list. A same-day edit costs far less in time and money than scheduling, executing, and processing a new photoshoot.
Reshoots still win in specific cases. Structural issues (a damaged gutter, a cracked driveway) need to be fixed in person, not edited around. Appraisal-grade photos, where lighting and shadow direction may carry evidentiary weight, should reflect the property as it actually appeared. And sometimes a seller simply prefers real conditions over any edited version, which is a preference worth honoring. Timing your shoot for flattering natural light, often late afternoon, reduces how often you’ll need a sky swap in the first place. On genuinely overcast days, some photographers choose to shoot anyway and revisit at twilight rather than assume a reshoot is unnecessary.
What’s Ethical and What Crosses the Line?
The clearest way to think about sky replacement ethics: you’re allowed to change the weather, not the property. A cleaner sky behind an accurate house is enhancement. A sky that hides a sagging roofline or implies a view that doesn’t exist is misrepresentation.
Here’s a practical breakdown:
- Allowed: swapping a flat or blown-out sky for a clearer or more attractive one while every property feature stays untouched.
- Allowed: converting a daytime shot to a twilight look for mood, as long as the structure and grounds remain accurate.
- Not allowed: hiding roof damage, water stains, or structural defects behind a dramatic sky or heavy shadow.
- Not allowed: inventing exterior lighting fixtures, landscaping, or a view (mountains, ocean, skyline) that isn’t actually visible from the property.
Editors and agents generally agree that over-editing, including unrealistic sky replacements, can mislead buyers, and that honest enhancement should never alter the underlying facts of the listing. When you’re unsure whether an edit needs a disclosure, the safer move is to add one. A short line in the MLS remarks or agent notes covers you: “Exterior image enhanced for presentation” or “Sky enhanced; property features unaltered” both work well and take five seconds to add. Checking your local MLS or brokerage’s specific photo-editing policy before you publish is worth the two minutes it takes, since rules vary by market and by board.
Four categories cover almost every real estate photographer’s workflow, and each fits a different combination of speed, control, and volume.
Adobe Photoshop gives you the most granular control of any option. Its Sky Replacement feature auto-detects the sky and builds an initial mask, but you can refine every edge by hand using Photoshop’s painting and masking tools. That precision costs time. A single well-executed swap can take ten to twenty minutes if the edges are complicated.
Adobe Lightroom offers sky-specific masking tools built into its local adjustment panel. It’s faster than full manual Photoshop work and integrates directly into a typical culling-and-editing workflow, though it offers less fine control over tricky edges like bare tree branches.
Skylum Luminar Neo automates the entire process through its Sky AI tool, detecting, replacing, and harmonizing in far fewer clicks than a manual Photoshop edit. Editors should still match light direction and use restraint since Luminar’s dramatic sky presets can look overdone if applied without adjustment.
Hosted AI services, including HospitalityLens, remove the software learning curve entirely. You upload a photo and receive a finished result without touching masking tools yourself. Some AI-editing platforms even preserve original file metadata during the swap, similar to how Imagen AI’s sky tool retains XMP data while keeping the foreground untouched.
| Criteria |
Photoshop |
Lightroom |
Luminar Neo |
HospitalityLens |
| Ease of use |
Steep learning curve |
Moderate |
Easy |
Very easy |
| Automation |
Manual with AI assist |
Partial automation |
High automation |
Fully automated |
| Batch capability |
Limited without scripting |
Moderate |
Good |
Built for batch portfolios |
| Control over masks |
Full manual control |
Moderate control |
Limited manual control |
No manual control needed |
| Speed |
Slowest |
Moderate |
Fast |
Fastest |
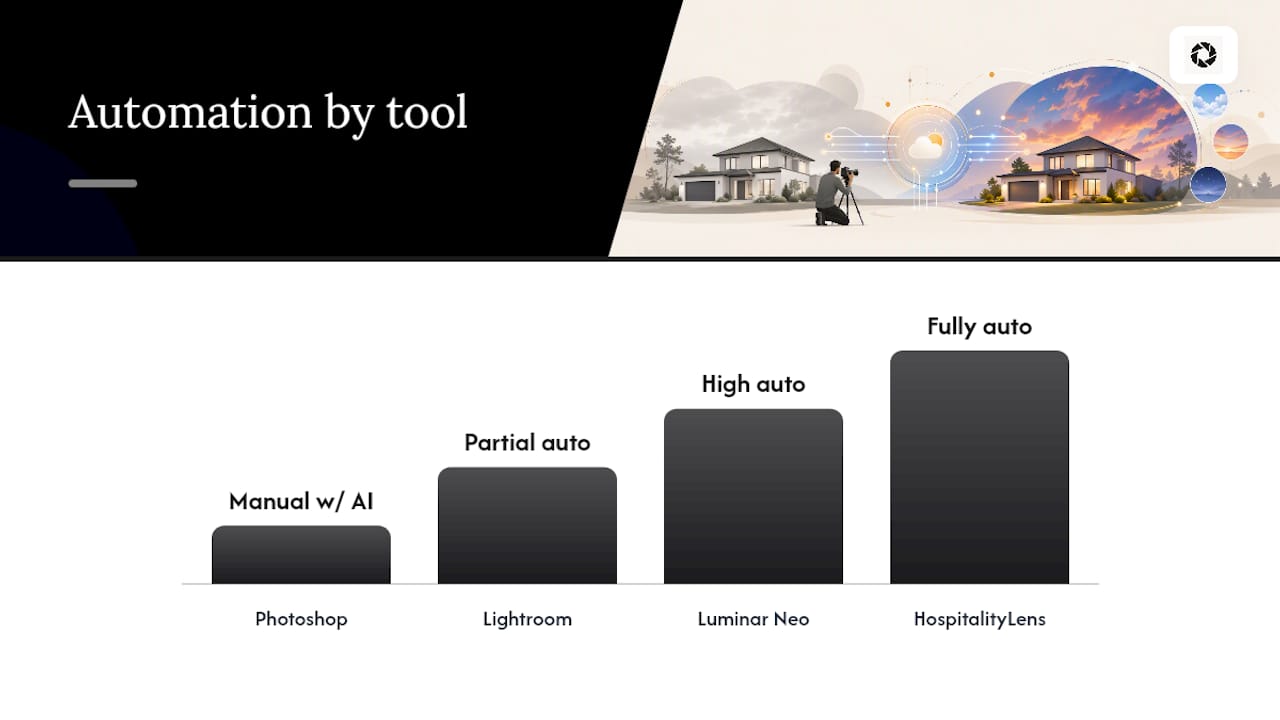
For property managers juggling more than a handful of listings, HospitalityLens fits a specific gap: you upload the photo you already have, whether it’s owner-submitted, cleaner-taken, or an older listing image, and get back a sky-corrected, professionally enhanced result. The free preview comes watermarked so you can judge the result before paying anything, and completed images include two revisions if the first pass isn’t quite right.
How Do You Make a Sky Swap Look Real?
The single most common giveaway in a bad sky replacement is mismatched light direction. If the new sky shows sun coming from the left but the shadows on the house fall as if the sun were on the right, the photo reads as fake almost instantly, even to viewers who couldn’t explain why. Before choosing a replacement sky, check where the shadows fall on the property and pick a sky whose implied sun position agrees with them.
Color temperature and luminosity need matching too. A warm, golden-hour sky pasted over a house lit with flat, cool midday light creates a visible seam even when the mask itself is perfect. Run through this checklist before calling an edit finished:
- Match the sky’s warmth (or coolness) to the existing light on the building.
- Apply a secondary color grade across the whole image so foreground and sky share the same overall tone.
- Use selective dodging and burning near the horizon line to blend the transition.
- Check the blend at the horizon specifically. That’s where mismatches are most visible.
Pro Tip: Treat sky replacement as a surgical, targeted swap followed by a secondary color grade, never as a blanket filter dropped over the whole photo. A quick global filter is what makes an edit look artificial; a small, deliberate grade after the swap is what makes it disappear.
How Do You Replace a Sky, Step by Step?
Here’s a concise Photoshop sequence you can follow on a single image:
- Open the photo and select Edit > Sky Replacement.
- Choose a sky from the built-in library or import your own, matching its light direction to the shadows already in the shot.
- Refine the auto-generated mask using the brush tool, paying close attention to rooflines, antennas, and tree branches.
- Enable foreground light and color adjustment so Photoshop harmonizes the building’s tones to the new sky.
- Apply a final grade pass, adjusting exposure and white balance across the whole frame for consistency.
- Flatten and export.
If you’re working in an AI tool or a hosted service instead, the checklist shortens considerably: upload the photo, choose a sky style that matches your property’s existing lighting, keep automatic harmonization turned on rather than disabling it for a “more dramatic” look, and set batch options if you’re processing an entire gallery at once.
Before you export anything, run this pre-export check:
- Compare exposure between the sky and the building. They should feel like one photograph, not two stitched together.
- Check window reflections. Do they still make sense with the new sky, or does the glass reflect a sky that no longer exists in the frame?
- Zoom to 100% and inspect edges around rooflines and branches for halos or fringing.
- Confirm your disclosure text is ready if your MLS or brokerage expects one.
What Goes Wrong (and How Do You Fix It)?
Most sky replacement problems fall into four repeatable categories, and each has a fast fix.
- Haloing at rooflines: a faint bright or dark outline traces the edge of the roof against the new sky. Refine the mask in Photoshop using a smaller, harder brush along the edge, or tighten the mask brush in Luminar Neo around that specific section.
- Mismatched color cast: the building looks like it’s lit by a different sun than the sky implies. Adjust the harmonization slider in your AI tool, or add a manual color balance layer in Photoshop that shifts the foreground toward the sky’s dominant hue.
- Blown-out foreground highlights: bright siding or a white roof looks overexposed next to a moody new sky. Pull highlights down locally on the foreground before applying the sky swap, not after.
- Incorrect window reflections: glass still reflects the old sky, creating a visible contradiction with the new one. This one often can’t be fixed with a slider. If reflections are large and obvious, that’s a sign to stop editing and consider a reshoot instead.
Structural inaccuracies and appraisal-grade requirements are the two situations where no amount of editing should substitute for new photos. If the shadows can’t be reconciled no matter how much you adjust, or the photo will be used for a formal valuation, schedule a reshoot rather than keep pushing pixels.
How Should You Export and Deliver Edited Listing Photos?
Export settings matter more than most photographers assume, since a photo that looks great in Photoshop can look muddy or oversized once it hits an MLS feed. Save as JPEG in the sRGB color profile, since that’s what nearly every listing platform and booking site expects. For web display, aim for a longest edge around 2,048 pixels, which balances sharpness against file size for fast loading on both desktop and mobile.
Keep your original, unedited file and your finished edit as two separate files rather than overwriting the source. Use descriptive filenames that flag the edit, something like “123Main_Exterior_SkyEdit_Final.jpg,” and consider adding a note in the file’s XMP metadata or your internal notes stating the sky was enhanced. That small habit protects you if a broker or buyer ever asks about a specific photo months later.
On the delivery side, a watermarked preview before final payment is a smart standard practice, since it lets a client confirm the result matches expectations before committing. Pair every enhanced batch with a short disclosure line for the agent or listing team, and set clear turnaround expectations upfront so nobody is guessing whether photos will be ready before a listing goes live. For more on how enhanced exteriors affect engagement, see this breakdown of property photo enhancement best practices.
When Should You Hire a Photographer Instead of Editing?
Editing solves a lot of problems, but not all of them, and it helps to have a clear set of rules rather than deciding case by case under deadline pressure.
Hire a professional photographer when the shoot involves architectural detail that depends on precise angle and lens choice, when a luxury listing needs lighting that no amount of post-processing can fake, or when the photos will support a formal appraisal where shadow direction and exposure accuracy actually matter. If you need proof of exact structural condition, a photographer capturing new angles beats any edit applied to an old one.
Editing is the better call when the constraint is schedule, not quality. If you’re refreshing twenty listings before a seasonal push, or a property manager just submitted phone photos from a new unit that needs to go live this week, editing gets booking-ready images out the door faster than arranging a new shoot ever could. If you need accurate shadow direction for an appraisal, reshoot. If you need a faster, cheaper refresh across a portfolio and the underlying photos are usable, editing is the more practical route.
This is exactly the gap HospitalityLens is built to fill. When a reshoot isn’t feasible on the timeline you’re working with, and the photo you already have is fundamentally usable, HospitalityLens turns it into a booking-ready image without waiting on a photographer’s calendar. For vacation rental hosts juggling their own quick shoots between guest turnovers, that speed difference is often the deciding factor.
Try HospitalityLens on Your Next Listing Photo
HospitalityLens is the practical alternative to a full reshoot when your existing photos, whether shot by an owner, a cleaner, or your own phone, just need the sky (and everything else) cleaned up. Instead of arranging a new photoshoot for a dull-sky exterior, you upload what you already have and get back a corrected, booking-ready image.

Free watermarked preview. Pay only if you like it. No card is required to create the free watermarked preview. See current pricing for unlocks, one-time packs, and subscriptions.
Sources
FAQ
How do you replace a sky in a photo?
Select the sky region using a masking tool (manual in Photoshop, automatic in AI tools), swap in the new sky, then harmonize the foreground’s color and light to match.
How do you fix a blown-out sky in a photo?
A fully blown-out sky usually can’t be recovered with exposure sliders alone, so most editors replace it entirely rather than trying to pull back detail that was never captured.
How do you fix a sky replacement that looks wrong in Photoshop?
Check for mismatched light direction first, then refine the mask around rooflines and branches using Photoshop’s brush tools, and finish with a secondary color grade to blend foreground and sky.
Does Lightroom do sky replacement?
Lightroom includes sky-specific masking tools for local adjustments, though it offers less granular edge control than Photoshop’s dedicated Sky Replacement feature or Luminar Neo’s Sky AI.
Is sky replacement ethical for real estate listings?
It’s ethical when it changes the weather, not the property, and many agents add a short disclosure like “image enhanced for presentation” when local MLS rules call for it.
Recommended