Short-Term Rentals
$12 a Photo: Fast Photo Onboarding for Property Portfolios
Transform existing phone photos into booking-ready listing images rapidly and affordably, ensuring your properties go live faster without waiting for a professional photoshoot.
By Hospitality Lens · · 10 min read
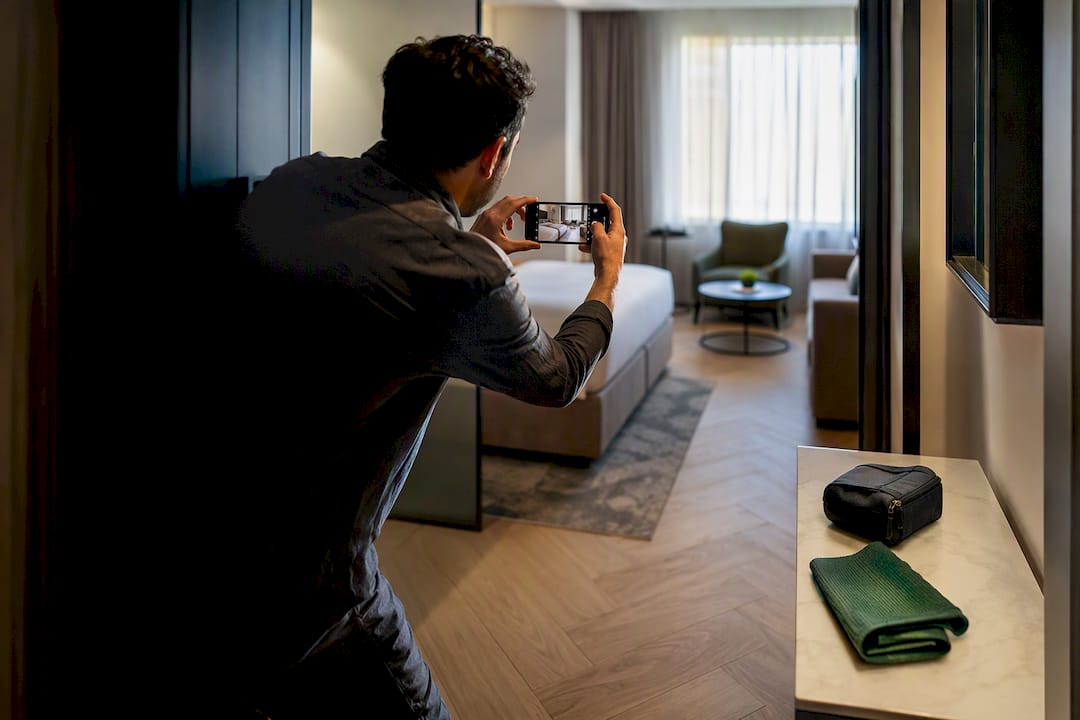
Fast photo onboarding means turning the phone photos an owner or cleaner already has into booking-ready listing images during a single operational session, using rapid culling plus AI enhancement instead of scheduling a new shoot. For most properties with usable source photos, that route beats waiting on a photographer: expect a watermarked preview in minutes and finished images in 24 to 72 hours, typically for a few dollars per photo. Reserve a professional shoot for flagship launches or photos too dark, blurry, or incomplete to fix.
TL;DR:
- Using AI to enhance phone photos can produce booking-ready images in 24 to 72 hours at a low cost, avoiding scheduling delays for most properties.
- The critical photos include one hero shot and key living spaces, with up to 20 supporting images focusing on clarity, natural light, and accurate framing.
- Photo files should be exported at 1920×1280 pixels in JPEG format, with a focus on exposure and horizon level to prevent platform recompression issues.
- A fast onboarding workflow involves specific instructions, quick culling, AI enhancement, and sequencing shots to highlight differentiators like views or amenities.
- Professional shoots are necessary only when photos are too blurry, dark, or incomplete to fix or require unique angles, but corrected phone photos often suffice to launch listings quickly.
HospitalityLens
Refresh Listings Without A Photoshoot
Turn usable phone or existing listing photos into realistic, booking-ready images for faster property onboarding and portfolio updates.
Table of Contents
What Counts as a Minimum Photo Checklist for a Booking-Ready Listing?
You don’t need fifty photos to publish. You need the right handful, shot correctly, and a system to gather more without slowing down onboarding.
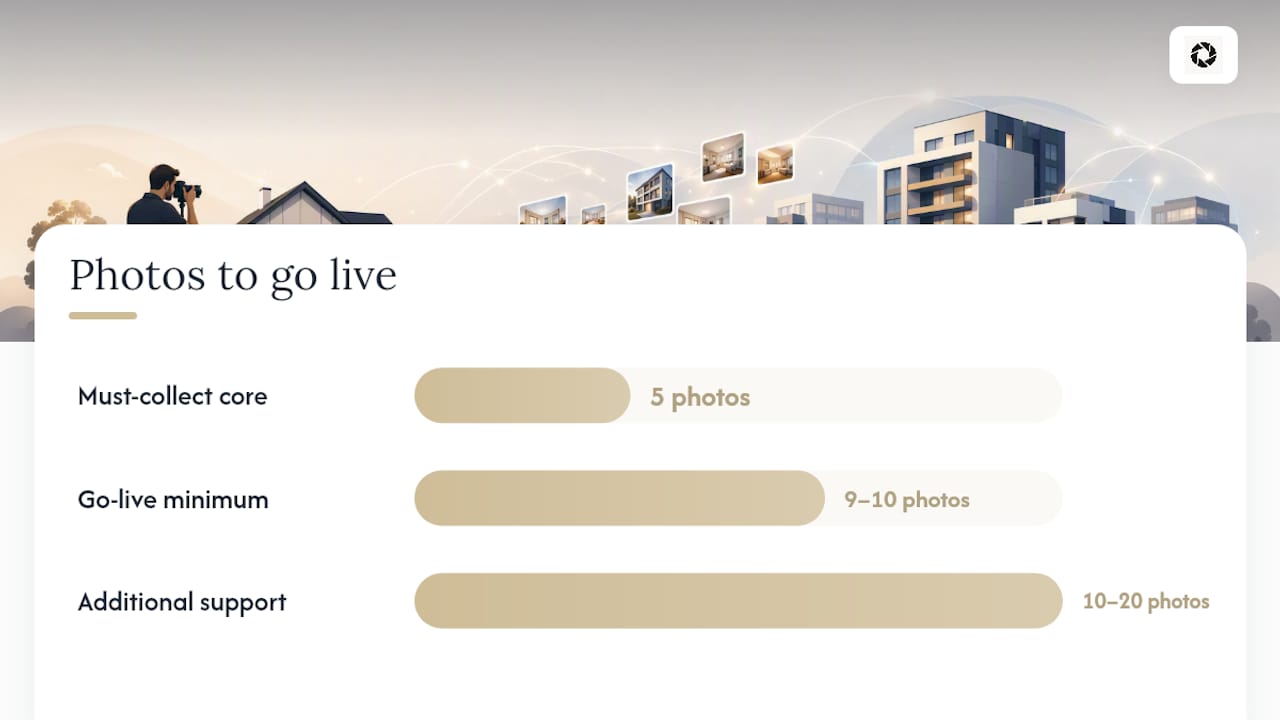
Start with a hero cover shot plus core spaces, then round out the gallery with support images once the listing is live, inspired by examples like the Photo Gallery Real Photos of Our Odessa TX Park Mesquite Oasis . Image quality can influence how people evaluate a listing, but there is no universal performance uplift that applies to every property. Measure clicks, inquiries, bookings, or sales on the individual listing.
Must-collect immediately:
- One hero cover shot (the property’s clearest differentiator: view, pool, unique architecture, or standout living space)
- Living room, kitchen, primary bedroom, and one outdoor or amenity space
- 10 to 20 supporting shots covering every bedroom, bathroom, and shared area
Framing and content rules:
- Shoot landscape, 3:2 aspect ratio, horizon level (a crooked countertop reads as sloppy before a guest even registers the room)
- Shoot toward natural light, not into it
- Every frame should answer a guest question: sleeping capacity, kitchen completeness, or walkability to the water
File handling for speed:
- Export at 1920×1280 or higher so platforms don’t recompress an already-soft image
- Save as JPEG, not HEIC, to avoid upload friction on most listing platforms
- Name files by room (“primary_bed_01.jpg”) so batch uploads sort themselves
Listings with a substantial number of high-quality images consistently outperform thinner galleries, but that count can build over the following week. The nine or ten images above are what get you live today.
What Is the Step-by-Step Fast Onboarding Workflow?
A one-afternoon workflow gets raw photos to a published listing without ping-ponging between the owner, a photographer, and your booking platform for days.
- Intake. Send the owner or cleaner a short, specific request rather than “send some photos.” Something like: “Please shoot each room straight on, in daylight, holding the phone level. We need the living room, kitchen, both bedrooms, bathroom, and one outdoor shot.” Specific instructions cut the back-and-forth to zero in most cases.
- Cull. Reject anything blurry, backlit into a window, or missing the room’s key feature. Accept anything correctable: dim lighting, a slightly crooked horizon, visible clutter that can be edited out. A quick phone gallery review, sorted into “keep” and “reshoot request,” takes ten minutes for a typical unit.
- Enhance. For minor fixes, tools like Lightroom Mobile or Snapseed handle brightness and crop corrections in seconds per photo. For anything needing real correction, an AI enhancement pipeline handles lighting, horizon, and clutter cleanup at scale: submit the photo, get a free watermarked preview, request revisions if needed, then receive the final image.
- Sequence. Put the strongest differentiator first. Guests make their booking decision largely from the cover photo and first five images, so order those five to answer the questions guests ask most: what’s the view, how many beds, is the kitchen real, what’s the bathroom like, what’s outside. Write captions that state a benefit, not just a label. “Kitchen” tells guests nothing; “full kitchen with dishwasher and coffee maker” does.
- Publish and verify. Upload, then immediately check how each platform renders the images. Confirm nothing got cropped oddly, run a resolution spot check, and if you manage enough volume to justify it, test two different cover photo candidates over a few weeks to see which pulls more clicks.
Pro Tip: Keep a shared folder template ready before you ever contact a new owner. When the photos land, you already know exactly where each one goes and what’s missing, instead of improvising room by room.
For a documented version of this exact flow, HospitalityLens’s property manager onboarding photo workflow walks through a real intake-to-publish sequence.
Most quality complaints trace back to compression, not the original photo. Every major booking platform recompresses whatever you upload, so submitting a soft image guarantees a softer one on the live listing.
- Upload at 1920×1280 pixels or higher, even though the platform will display it smaller
- Stick to 3:2 landscape orientation across the gallery for visual consistency
- Export JPEGs at high quality settings (80 to 100%) rather than relying on the platform to compensate for a heavily compressed source file
- Keep individual files under roughly 10MB unless the platform specifies otherwise, since oversized files sometimes trigger upload failures rather than automatic resizing
Quick quality pass before you upload anything: check exposure first (can you see detail in shadows and highlights, or is one blown out), then horizon level, then visible clutter in the frame. Fix exposure and horizon before worrying about small clutter items, since those two errors are what make a photo look unprofessional at a glance, while a stray charging cable is a five-second retouch.
Image quality can influence how people evaluate a listing, but there is no universal performance uplift that applies to every property. Measure clicks, inquiries, bookings, or sales on the individual listing. Get those five technically clean before worrying about the rest of the gallery.
HospitalityLens’s image standards guide breaks down room-by-room evaluation criteria if you’re setting a portfolio-wide standard.
Should You Use AI Enhancement or Hire a Photographer?
The decision comes down to whether your source photos are fixable or fundamentally broken.
- Choose AI enhancement when: the photos are usable but dim, crooked, or cluttered, and the room’s real features are visible in frame. This is the faster and cheaper path for onboarding, seasonal refreshes, and underperforming listings.
- Choose a professional shoot when: you need angles nobody captured, architectural or twilight exterior work, or the existing photos are too blurry, dark, or incomplete to correct. Image quality can influence how people evaluate a listing, but there is no universal performance uplift that applies to every property. Measure clicks, inquiries, bookings, or sales on the individual listing.
- Document your edits. Keep a record of what was corrected (lighting, perspective, clutter removal) versus what’s original to the property. This protects you against guest misrepresentation claims and keeps staging drift from creeping into the gallery over time.
If a pro shoot is the right call, HospitalityLens’s photographer directory is a starting point for sourcing one.
What Does a Real Fast Photo Onboarding Example Look Like?
Here’s how the workflow plays out with HospitalityLens specifically, since transparent pricing and turnaround matter more than promises when you’re onboarding a new property under deadline.
- Intake: upload the owner’s or cleaner’s phone photos directly.
- Free preview: receive a watermarked preview within minutes so you can judge the correction before committing.
- Choose edits: approve the preview or request adjustments; each purchased photo includes two revisions on a one-time pack or three on a subscription.
- Final delivery: watermark-free images typically arrive in 24 to 72 hours depending on batch size.
Pricing terms are available on the HospitalityLens website, where users can find details of free trials, pack pricing, and subscription options with included revisions. See a before-and-after example for what the final output looks like.
Why Photos Deserve a Recurring Spot on Your Ops Calendar
Treat your gallery like inventory, not a launch-day afterthought. Annual reviews and seasonal swaps, especially around your cover photo and first five images, are where the measurable booking gains actually show up. Pair that habit with a documented reference set after any reset, and staging drift stops eroding the trust your photos built in the first place.
— The HospitalityLens Team
Get Your First Booking-Ready Photo Without Scheduling a Shoot
If you’re managing onboarding across multiple properties, waiting on photographer availability is often the real bottleneck, not the photo quality itself. HospitalityLens turns the phone photos you already have into corrected, booking-ready images without a scheduling delay: lighting and color correction, perspective and horizon fixes, clutter cleanup, and object removal, all while keeping the property exactly as it is. Nothing gets invented, no rooms, views, or amenities added.

Free watermarked preview. Pay only if you like it. No card is required to create the free watermarked preview. See current pricing for unlocks, one-time packs, and subscriptions.
Sources
FAQ
What Is Fast Photo Onboarding?
It’s the process of converting owner-submitted, cleaner-taken, or phone photos into corrected, booking-ready listing images during a single operational session, typically using AI enhancement rather than scheduling a new shoot.
How Long Does Fast Photo Onboarding Take?
A watermarked preview usually arrives in minutes, with final, watermark-free images delivered in 24 to 72 hours depending on batch volume.
Do I Need a Professional Photographer for a New Listing?
Only if your source photos are unusable or the property is a flagship launch needing new angles; otherwise, correctable phone photos plus AI enhancement, like the process HospitalityLens offers, get you live faster and cheaper.
How Many Photos Do I Need to Publish a Listing?
You can publish with roughly nine to ten photos covering the cover shot, living spaces, bedrooms, and one outdoor image, then expand toward 20 or more over the following days.
What Resolution Should I Upload for Listing Photos?
Upload at 1920×1280 pixels or higher in 3:2 landscape orientation, since platforms recompress images and a low-resolution source will look softer once live.
Recommended